Introduction
To make our components work alone, one of the advantages we have to take advantage of Storybook is to make use of its extensions. Today we will be talking about how to integrate Storybook with Mock Service Worker, a tool to simulate our API responses when we make REST-like requests with axios or fetch.
Part 1 Requirements
In the first part of this article, we made a small introduction to Storybook and how to configure it. Also, how to use the default tools that help us to understand Storybook. We recommend reading them to be able to perform the steps we are going to explain in this article.
Application code
https://github.com/giorbismiguel/aprendiendo_storybook
What is Mock Service Worker?
Mock Service Work (MSW) is a library for intercepting requests in the browser and in Nodejs. It allows you to simulate the response that the server can return, when requests are made to the server using REST or GrapQL API. So it will allow you to develop components that do not need to have a response from the server.
Installation and configuration
If you followed the steps in the previous article, you must have a React project with Storybook configured to be able to install the MSV library. Based on that, the first thing you should do is open your favorite console and navigate to the directory where you have the installation or simply open your project with your favorite code editor and run the following command to install MSW.
yarn add msw –dev
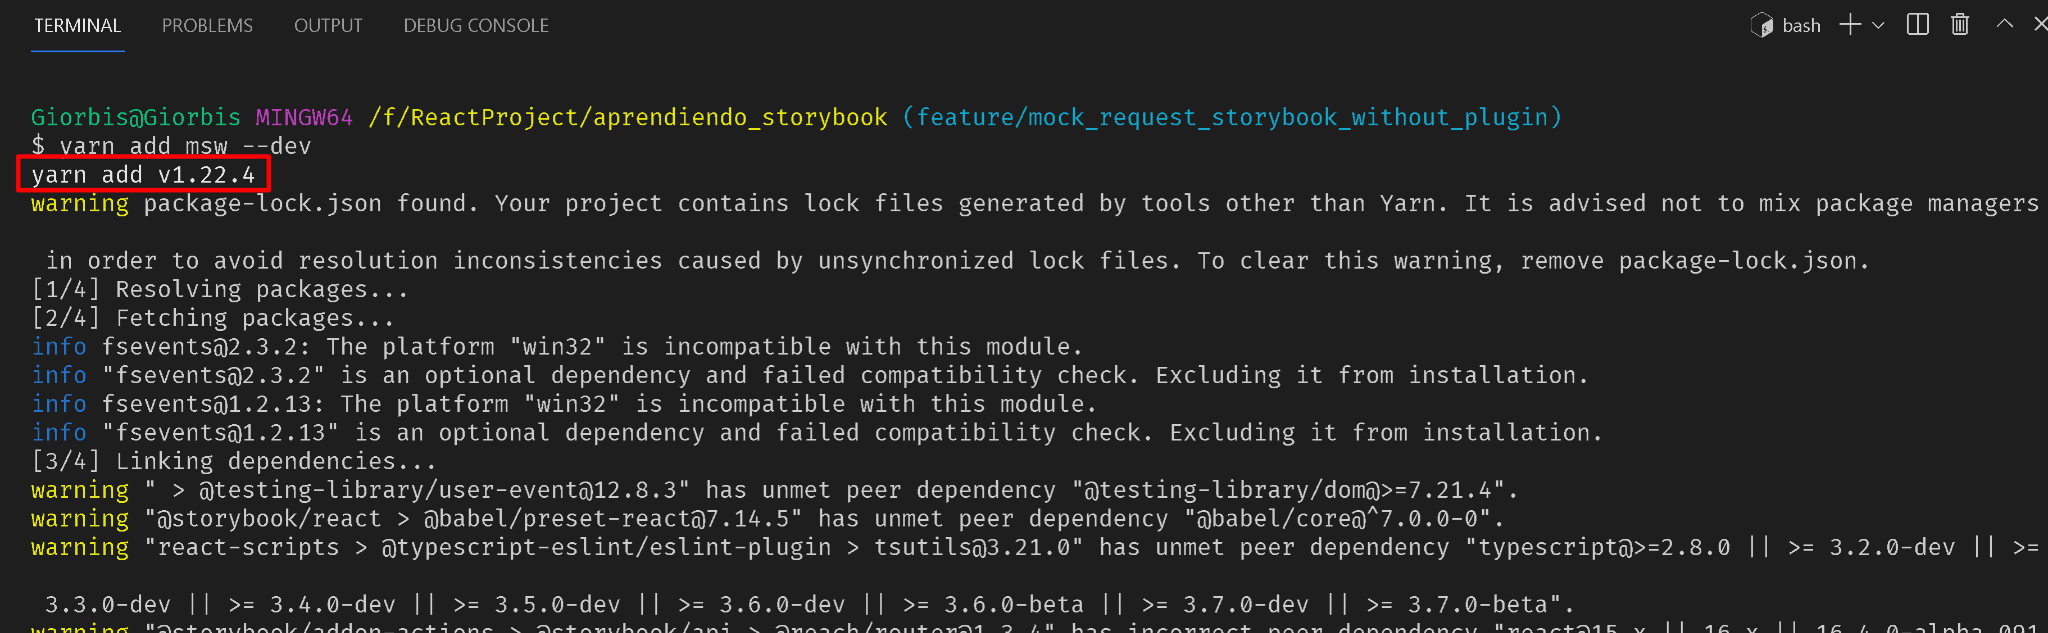
Once the MSW installation is finished we must generate the service workers that will answer the requests for which you must execute the following command:
npx msw init <PUBLIC_DIR> -save
<PUBLIC_DIR> is the directory where the service worker will be installed, so for a React project the command would be:
npx msw init ./public -save
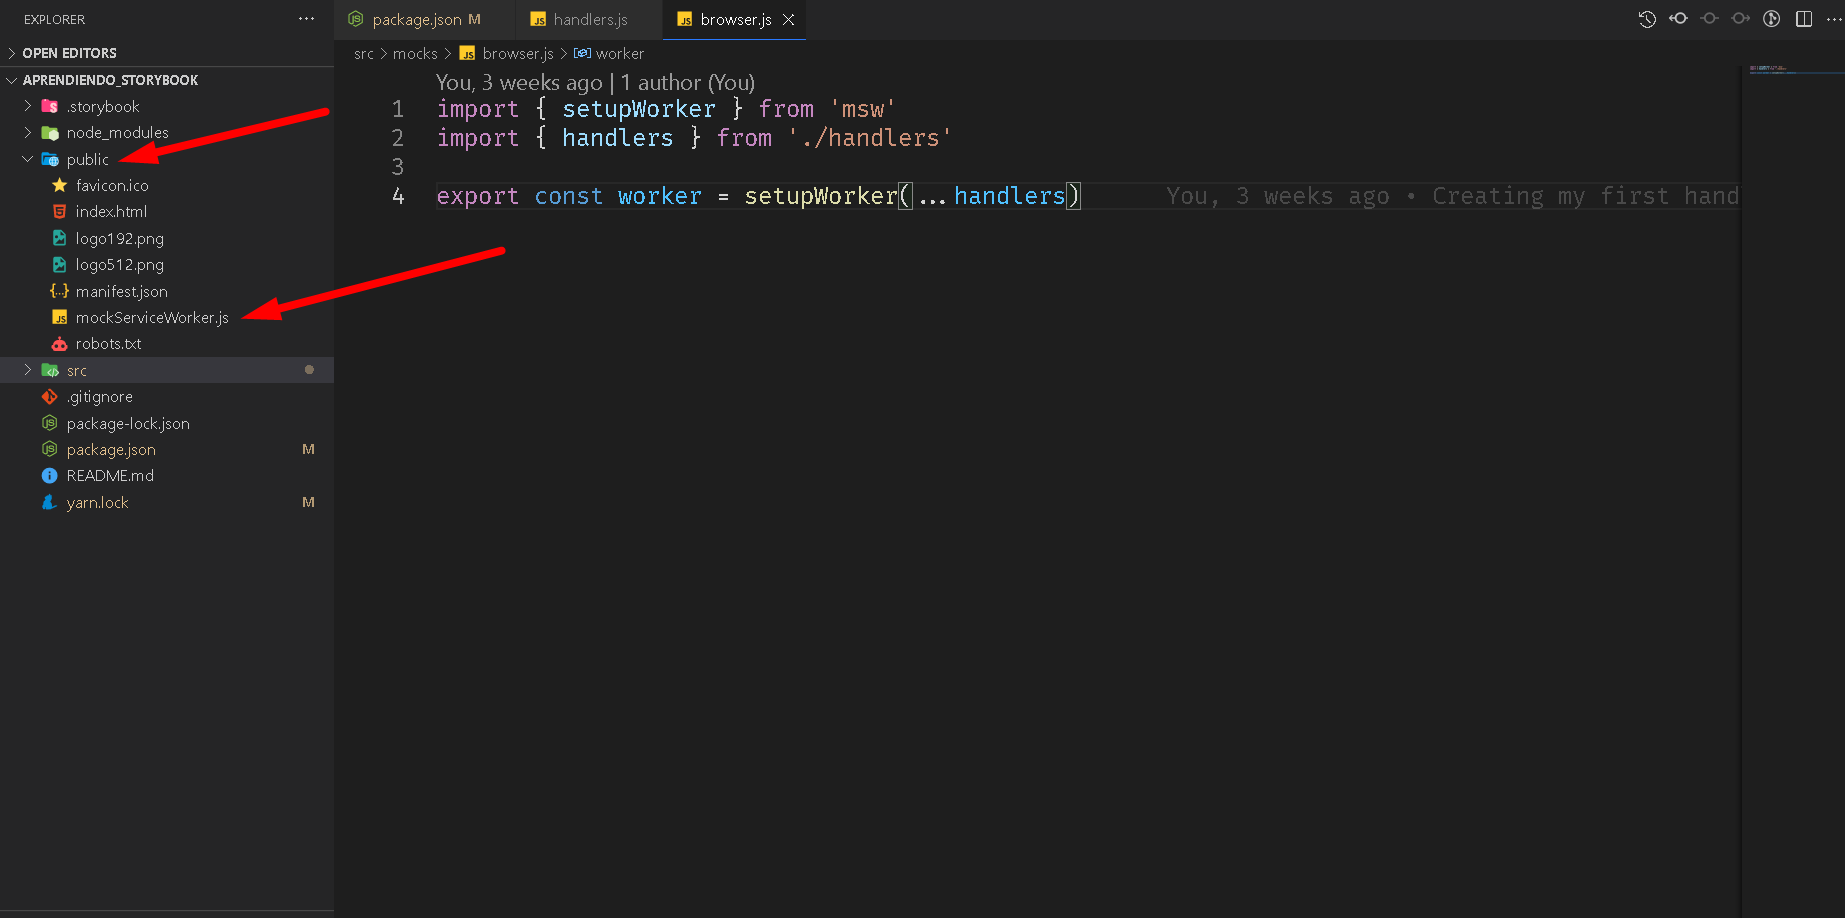
The result after executing the command can be seen in the following image. The command creates inside the public folder a file with the name mockServiceWorker.js
Note: If you want to know how to execute this command, according to the directory for other projects, visit the following link:
https://mswjs.io/docs/getting-started/integrate/browser#where-is-my-public-directory.
After installing MSW and creating the Service Worker in our file: package.json add what is shown in the image:
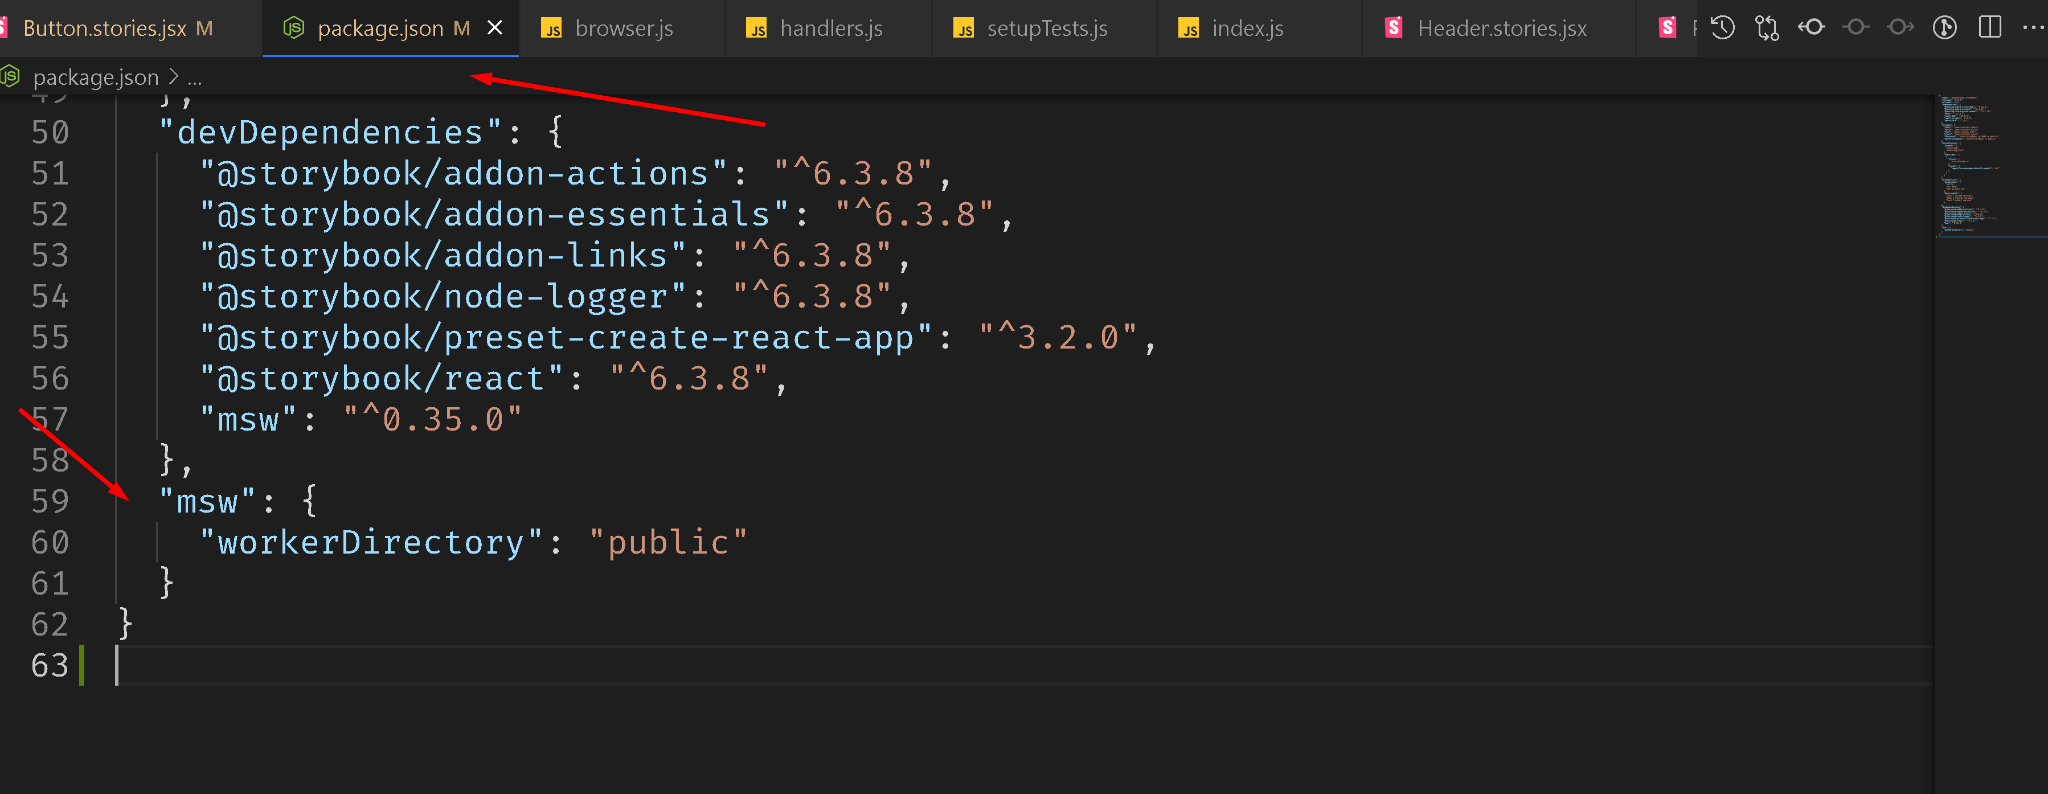
Now we have to tell Storybook to run the service workers we have installed, modify the storybook command in the package.json file and add the directory (./public) where the service worker was generated.
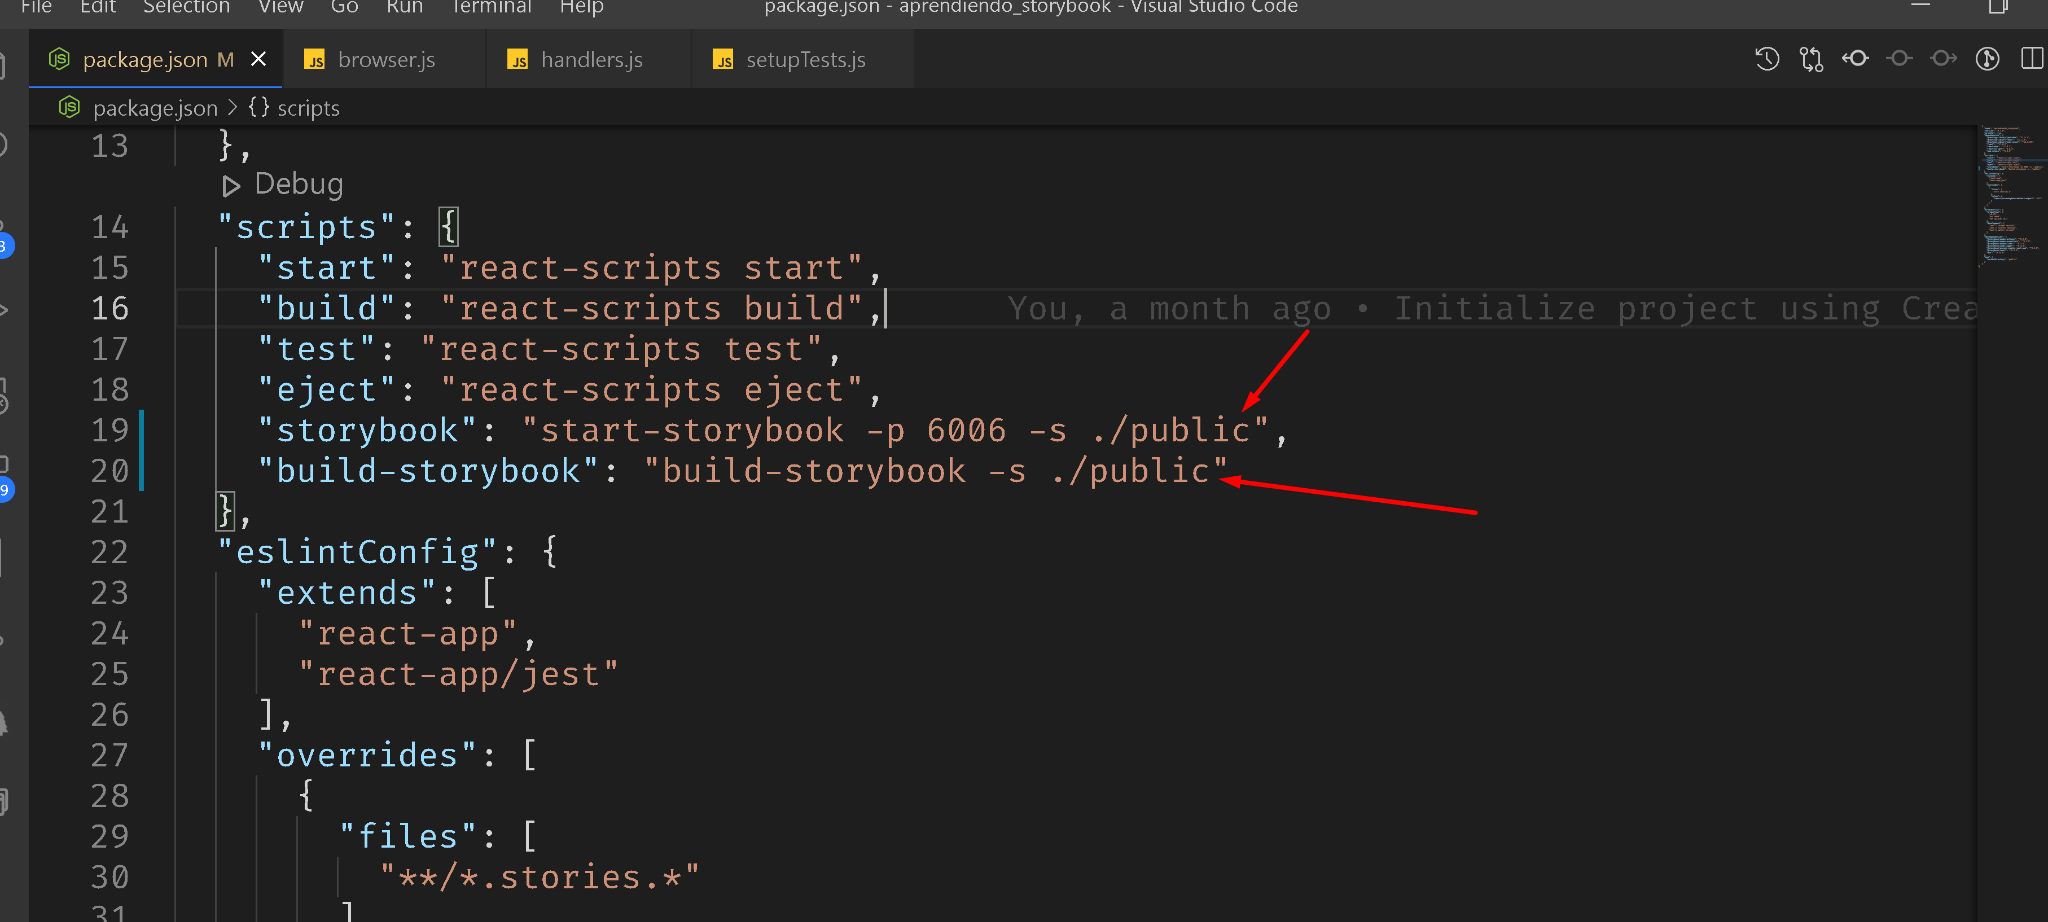
Note: For the storybook and build-storybook command, ./public was added at the end.
Create component and its history
We are going to create a component with its history, which makes a request to Github to get the user’s data. This request is what we are going to mock, using MSW inside Storybook.
To continue, create a folder inside the directory: src with the name components and add a file with the name: GitHubUser.jsx, containing this code:
import React from 'react'
import { useFetch } from '../hooks/useFetch'
import './GitHubUser.css'

export const GitHubUser = ({ username }) => {
  const { data, loading, error, refetch } = useFetch(
    `https://api.github.com/users/${username}`
  )
  const { name, login, avatar_url } = data || {}

  const containerClassNames = [
    'container',
    loading && 'loading',
    error && 'error',
  ]
    .filter(Boolean)
    .join(' ')

  return (
    <div className={containerClassNames}>
      <div className="avatar-container">
        {avatar_url && <img className="avatar" src={avatar_url} alt={name} />}
      </div>
      {error ? (
        <div>
          <p>Failed to fetch a GitHub user.</p>
          <button onClick={refetch}>Retry</button>
        </div>
      ) : (
        <div>
          <p className="name">{name}</p>
          <p className="username">{login}</p>
        </div>
      )}
    </div>
  )
}
In this file, we are simply making a request to Github to get the user’s data using a hook, which can be found at the following url:
https://github.com/giorbismiguel/aprendiendo_storybook/blob/feature/mock_request_storybook_without_plugin/src/hooks/useFetch.js.
Now let’s create the story in the same components’ directory. Inside the folder create a file with the name GitHubUser.stories.jsx, to the file add the following code:
import React from 'react'
import { GitHubUser } from "./GitHubUser";
import { rest } from 'msw'
import { worker } from '../../src/mocks/browser'

export default {
  title: "GitHub User",
  component: GitHubUser,
};

export const DefaultState = () => <GitHubUser username="giorbismiguel" />;
In the code a story is created with the name DefaultState, which has assigned to it the component that we created previously. When we load Storybook, it will make a request to the server that will be intercepted by the service worker.
Mocking the requests to the server
For MSW to know how to listen to the requests made to the server, we need to add handlers. These are functions that will listen to the requests that are made and will return the answer that we have defined, a json normally with some information to respond to the request.
For which it is necessary to create a folder with the name mocks, and inside the directory make a file with the name: handlers.js, add the code that is highlighted in the following image:
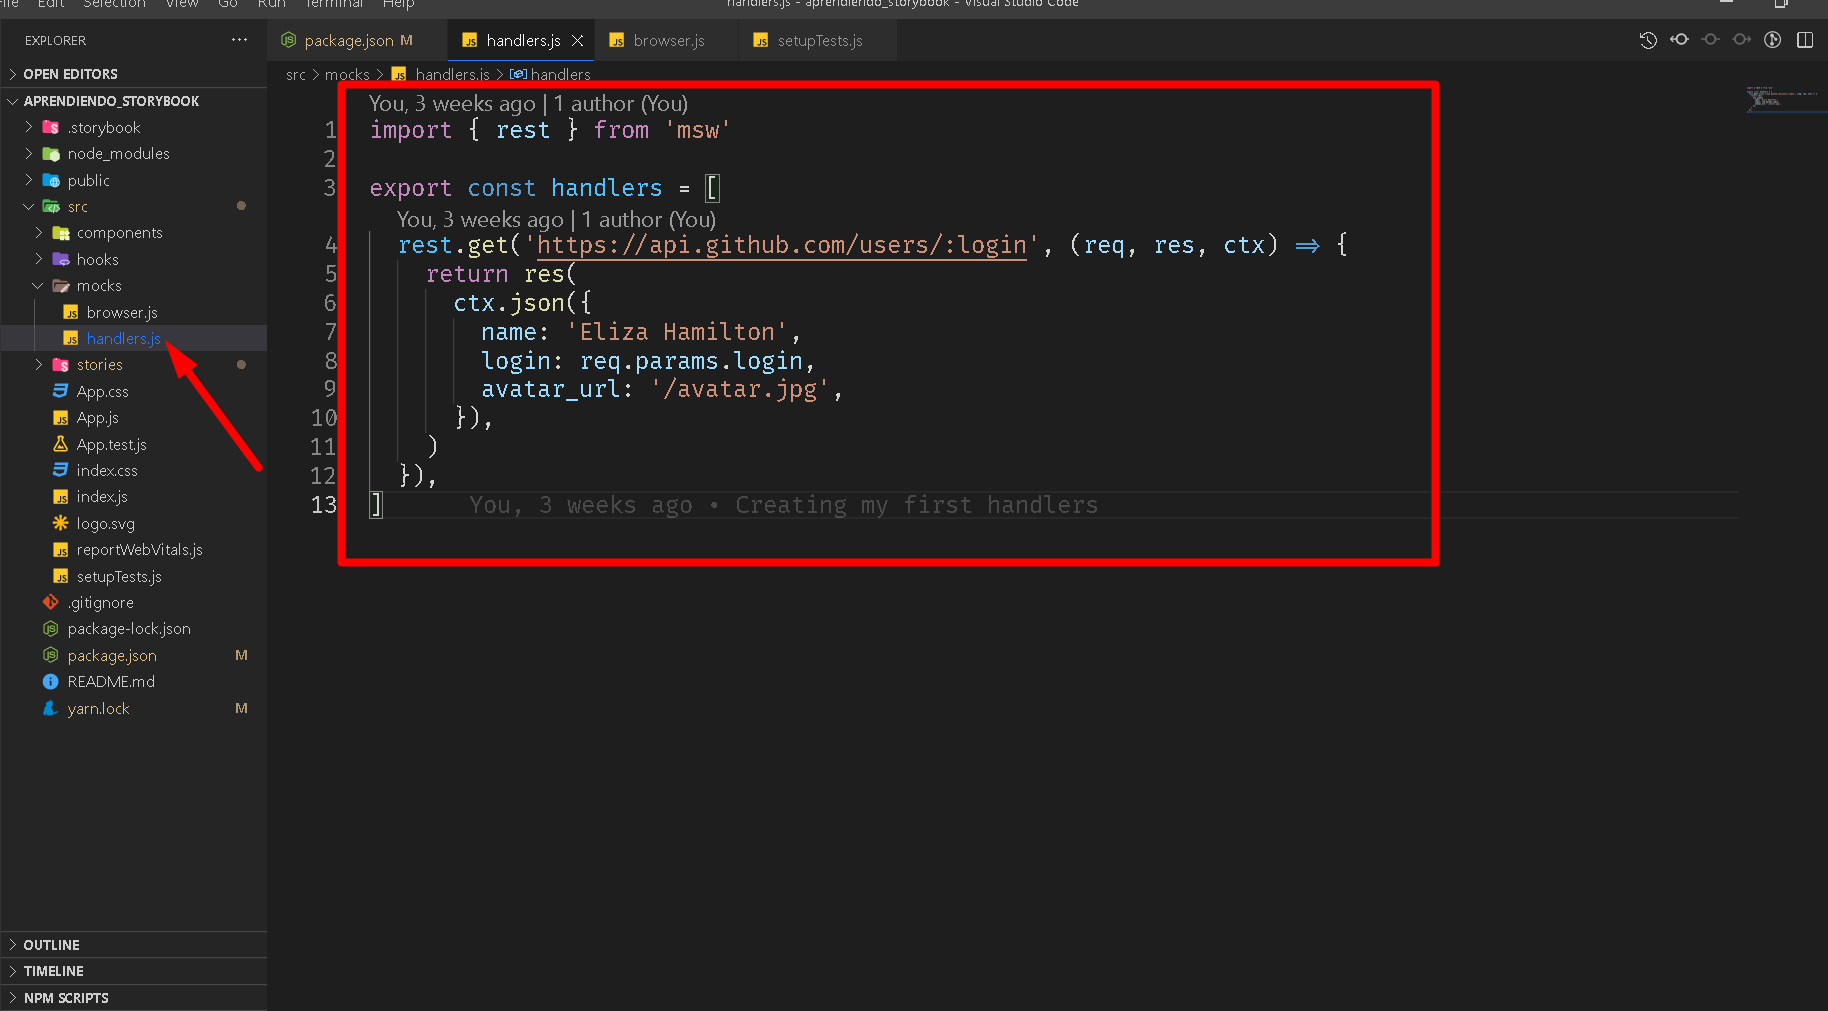
In the image the first thing we do is to import rest from the msw library. Then we export the constant handlers and assign it an array, inside each position of the array you can add a handler to listen to the REST requests you want. In this example, we create one in the first position of the array and using the function: rest.get we will listen to the requests for the url: https://api.github.com/users/:login and with the function res() we return the json object that is used in our ReactJS component.
The next step is to use the service worker with the handlers that we have defined. For which, you must create a file with the name browser.js inside the folder you did before. Write the code highlighted in the following image:
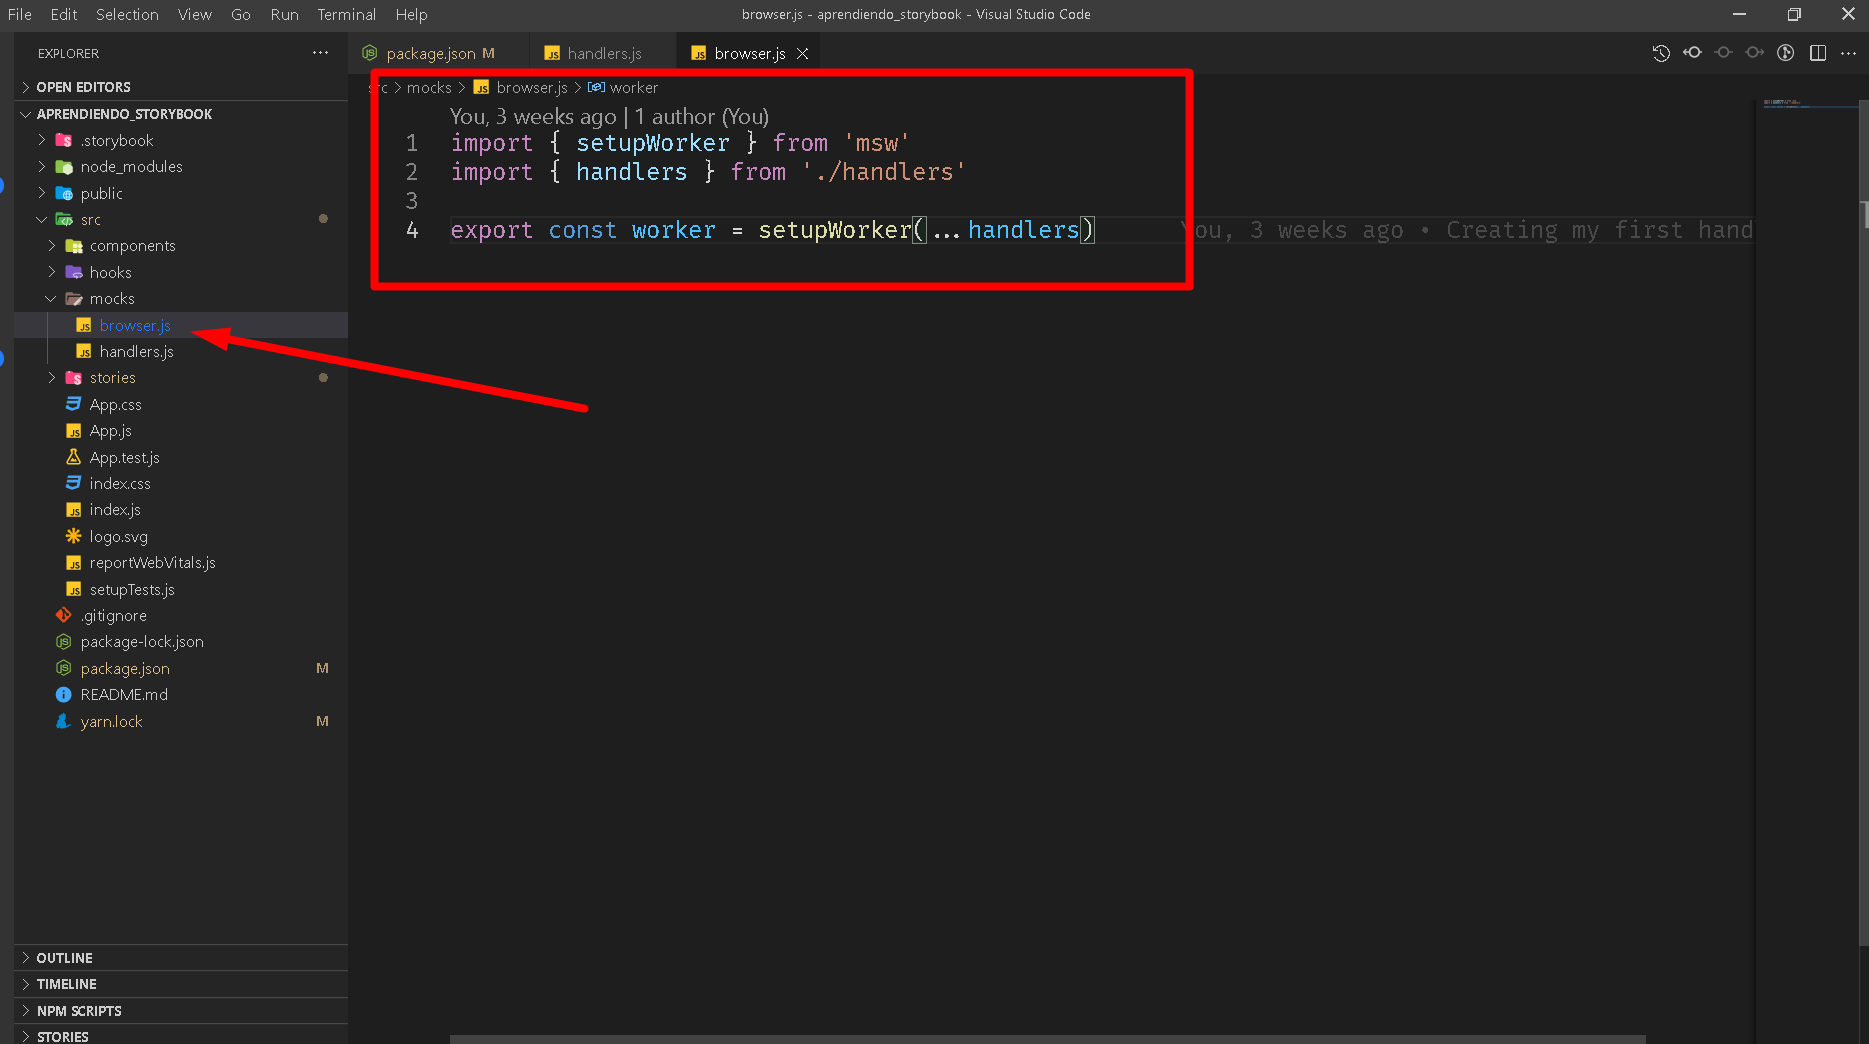
In the previous image, the service worker was configured using the setupWorker function, so that it adds all the handlers we have created and our service worker knows which URLs to listen for.
Then, the last step is to tell Storybook, in its configuration folder, to load the browser.js file we have defined, as highlighted in the following image:
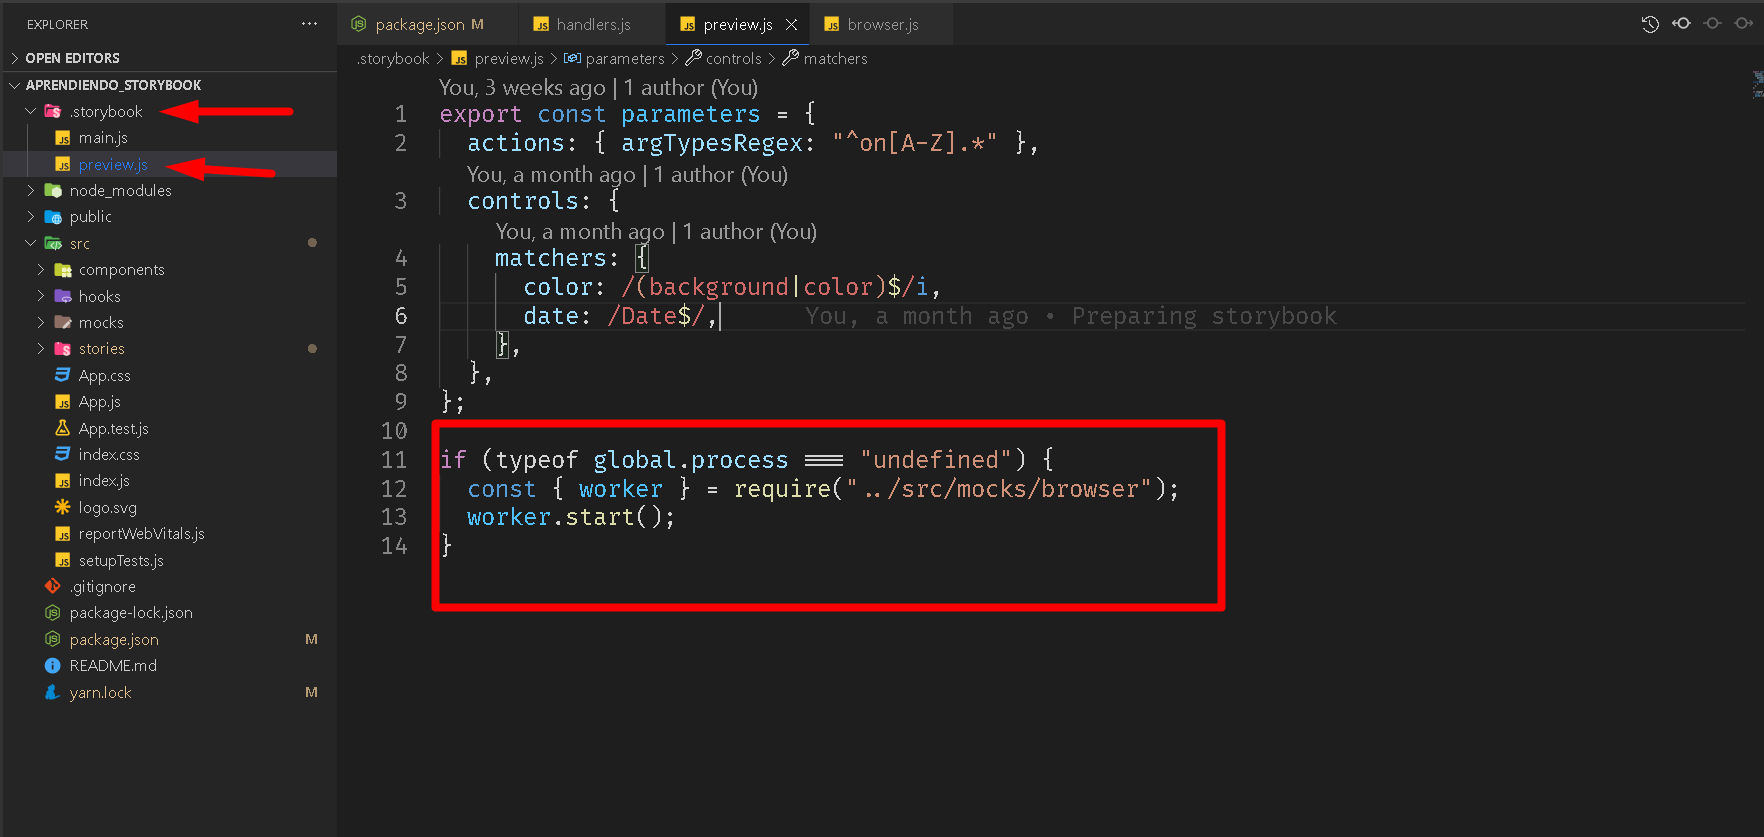
This configuration is to tell the Storybook to raise the worker, which is nothing more than to integrate with MSW and listen to the requests through the handlers that we add in the handlers.js file, which in turn loads the browser.js file.
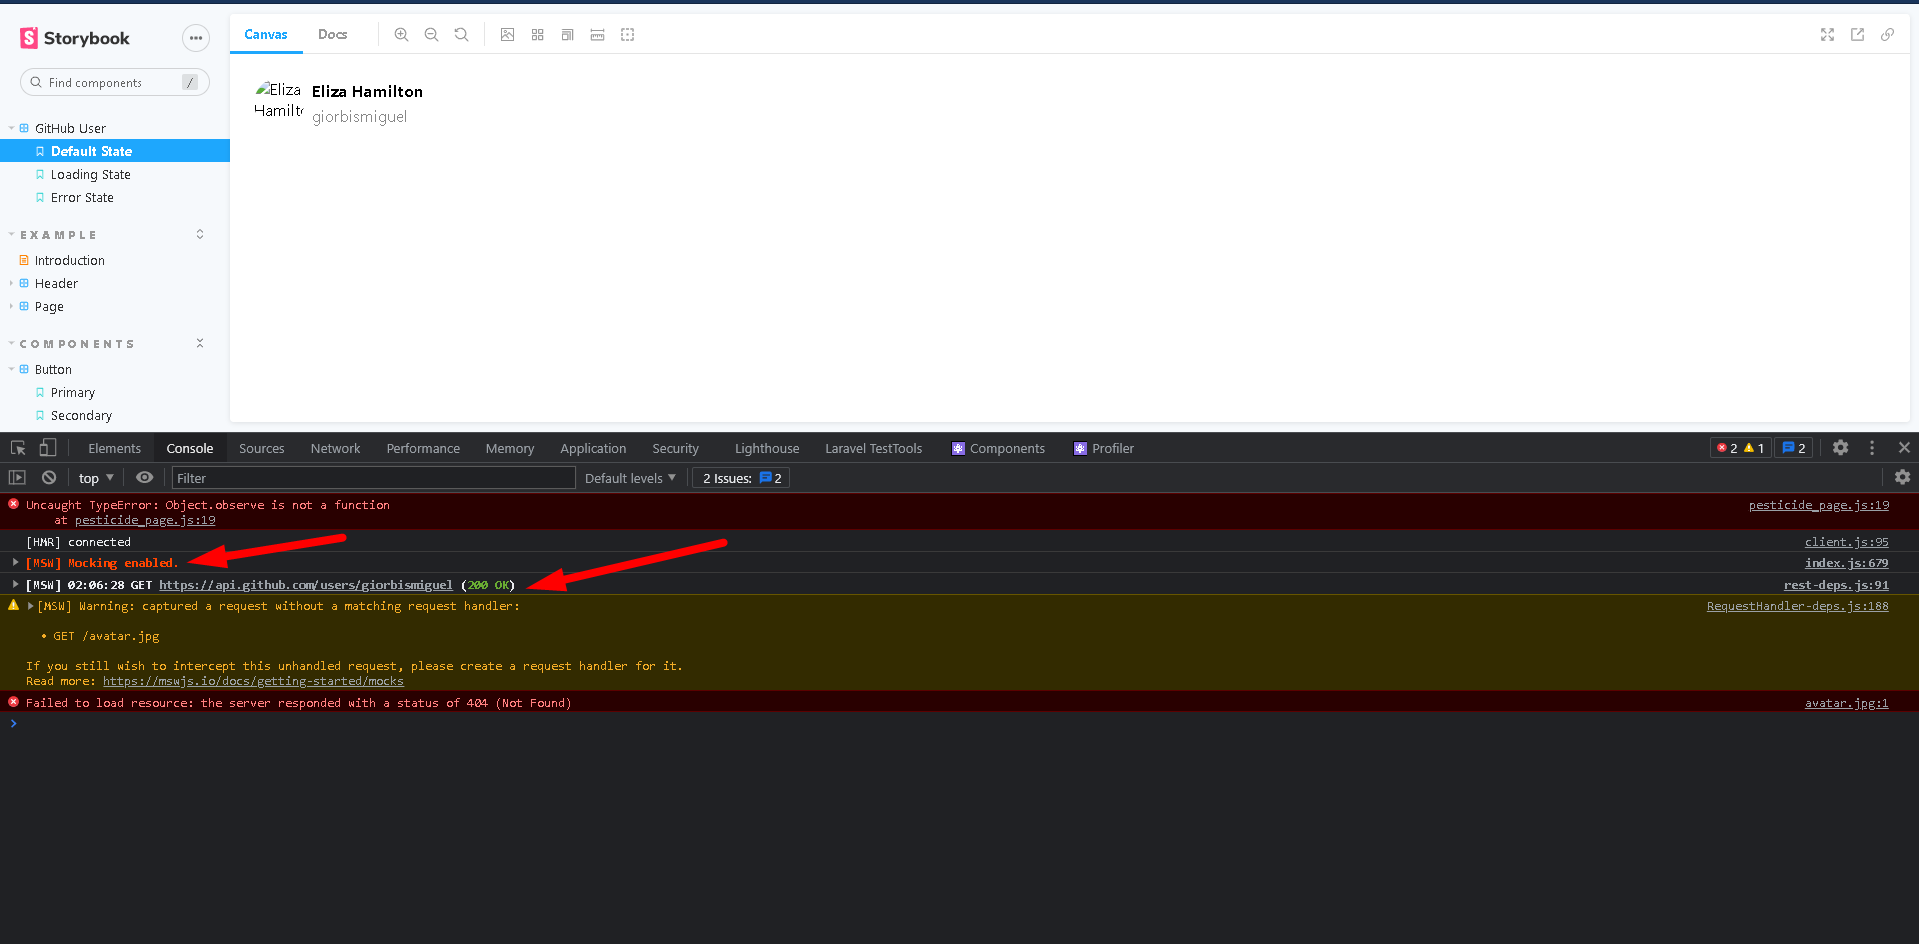
Now, execute the command: yarn storybook, as highlighted in the following image it should be shown in the console.
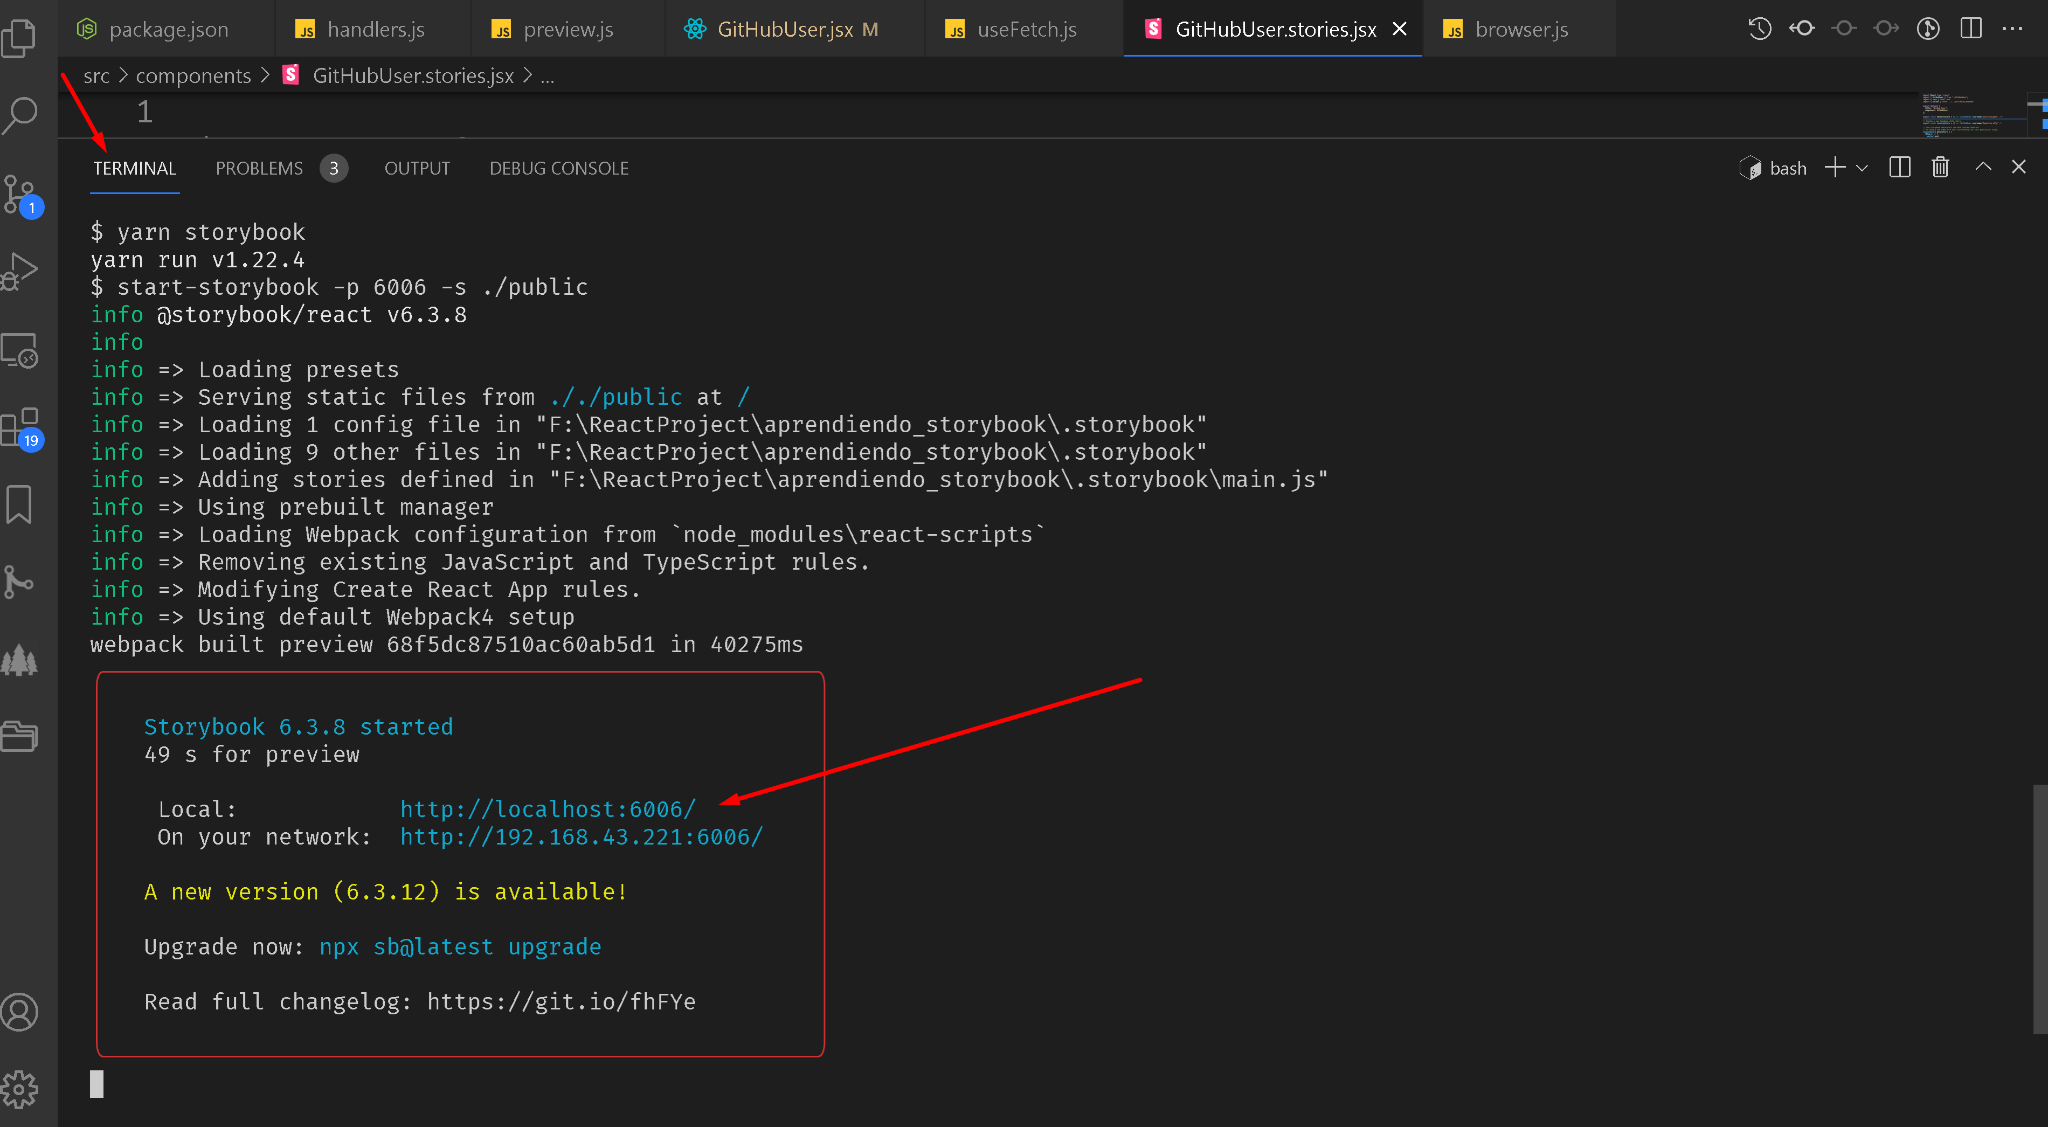
If you manage to see the console output, which is highlighted in the image above, then wait for a new tab to open in the browser. Then open the browser console and go to the history of the component you created. When you have the browser console open, check that MSW is enabled and the request got a response.
Conclusions
In this article we have learned how to use MSW together with Storybook, since mockeying the data of the components on the client side is very important in order not to overload the server with requests, since when testing is performed the same server is usually used for testing.
Bibliography
- https://mswjs.io
- https://dev.to/tmikeschu/integration-stories-elevating-storybook-with-mock-service-worker-22m3
- https://blog.logrocket.com/using-storybook-and-mock-service-worker-for-mocked-api-responses
- https://kentcdodds.com/blog/stop-mocking-fetch