Emergence of Storybook
The arrival of components to the web was a breakthrough for web application development, allowing the creation of reusable elements, and with it the emergence of Frameworks and libraries such as ReactJs, VueJs, and AngularJs, with the aim of further promoting this idea.
But there were no tools to organize these components and allow Frontend developers to create interfaces in an isolated and organized way. Given these problems is that the tool we will be talking about today arises: Storybook.
Why use Storybook
Community
Now, why select Storybook, when reviewing the library we can see that it has very good documentation, the popularity on github is very high as it has more than 64k stars, more than 100 PR proposals with new features and a very important feature: it allows to extend the functionality it already has through extensions.
Advantages
- Visually you will be able to interact with the component and its different stories and test it.
- You will be able to see the stories in the code organized around the component that groups them. It will eliminate the searches in the code to be able to see how it is used by the stories.
- Consolidate your thinking about what a component is and its portability.
- You will eliminate page reloads waiting for results from the server to see the behavior of the component, based on a set of data.
- You will not have sample data in the code that you will have to remove in the future.
- The stories can be accompanied by documentation to understand how the stories work.
Installation
The first requirement to be able to install Storybook is to have a ReatJs project created, so the first thing we are going to do is to create it, for this open your favorite console and go to your favorite directory to create projects and execute the command.
npx create-react-app aprendiendo_storybook

After creating the ReactJs project we enter the directory where it was installed, in this case: aprendiendo_storybook for that run the following command:
cd aprendiendo_storybook
And we proceed to install Storybook for which we execute the command:
npx sb init
With the above command Storybook will install all the necessary dependencies as well as create the necessary commands according to the framework so that the integration of both in the project is ready. In addition, it installs an example base that will help you understand how to create the stories associated to a component. To do this, create a folder inside the src folder with the name: stories, where you can see several example components and their stories.
The result in the console to check that everything went correctly should be:

If you have VScode installed run the command:
code
To open the editor and start exploring the examples that were installed.
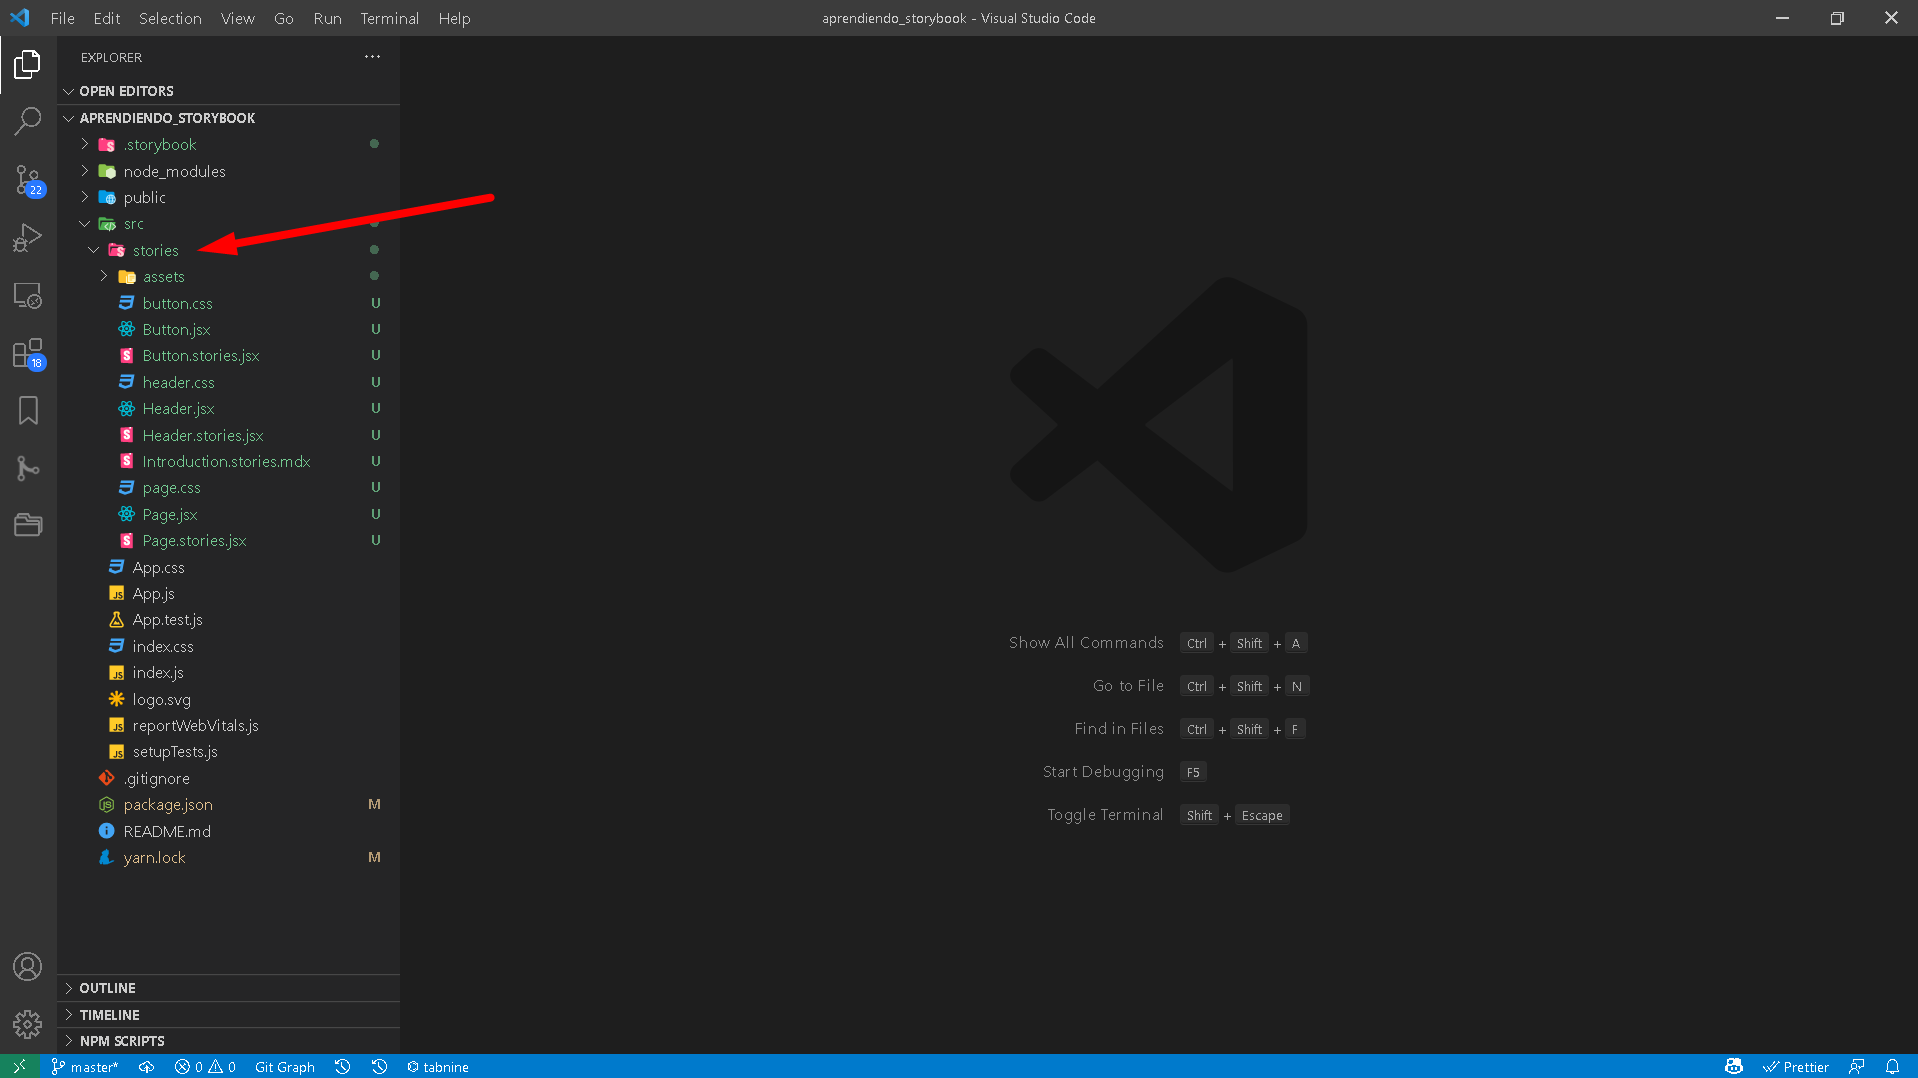
In the image above is pointed out the folder that was created Storybook and in which you will see 3 components: Button.jsx, Header.js and Page.jsx, it is also easy to distinguish three files with the same names as the components, only their extension ends in .stories.jsx, these are the stories that each component has, we are already getting warmed up….
Getting to know Storybook
The next step is to raise the Storybook server so inside the project folder run the command:
yarn storybook
The result in the console will be:
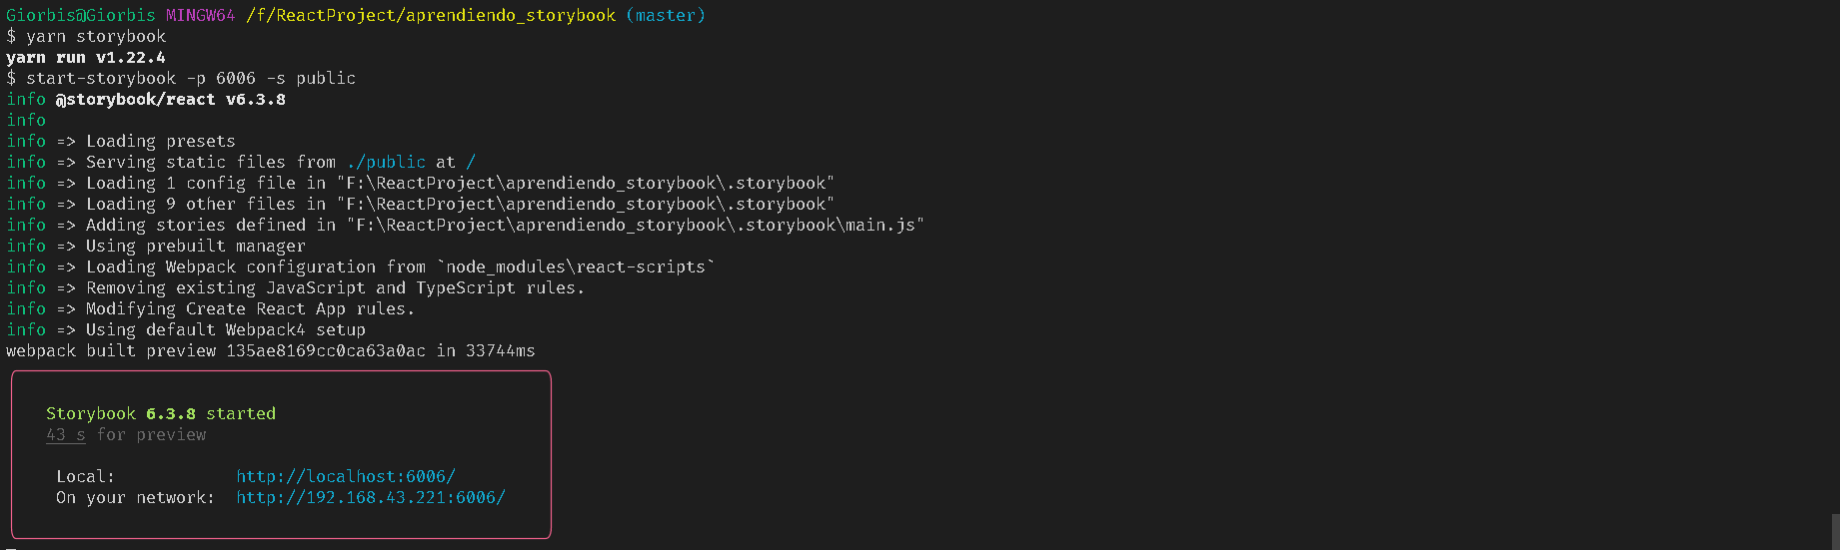
The important thing to highlight in the previous image is that we have available the Storybook server in the local url: http://localhost:6006/
This command searches in the project all the files that end with the extension .stories.jsx and raises a page where the stories of the components can be seen, the result can be seen in the following image:
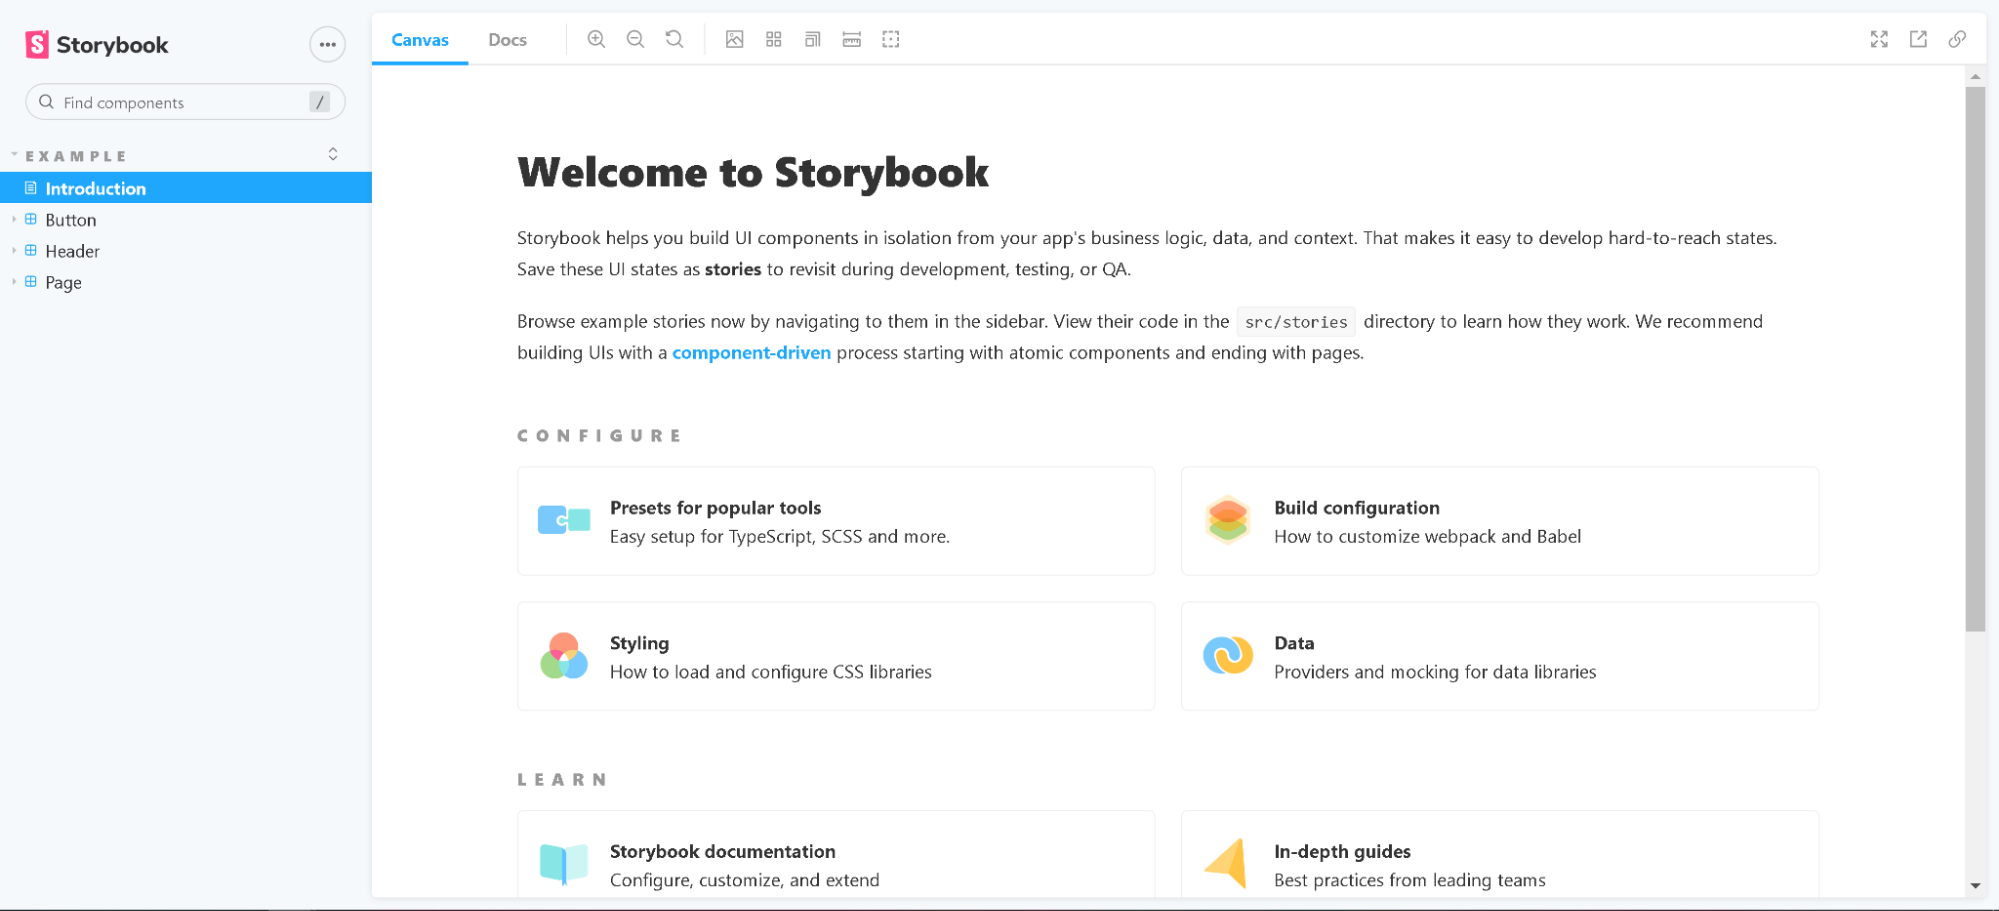
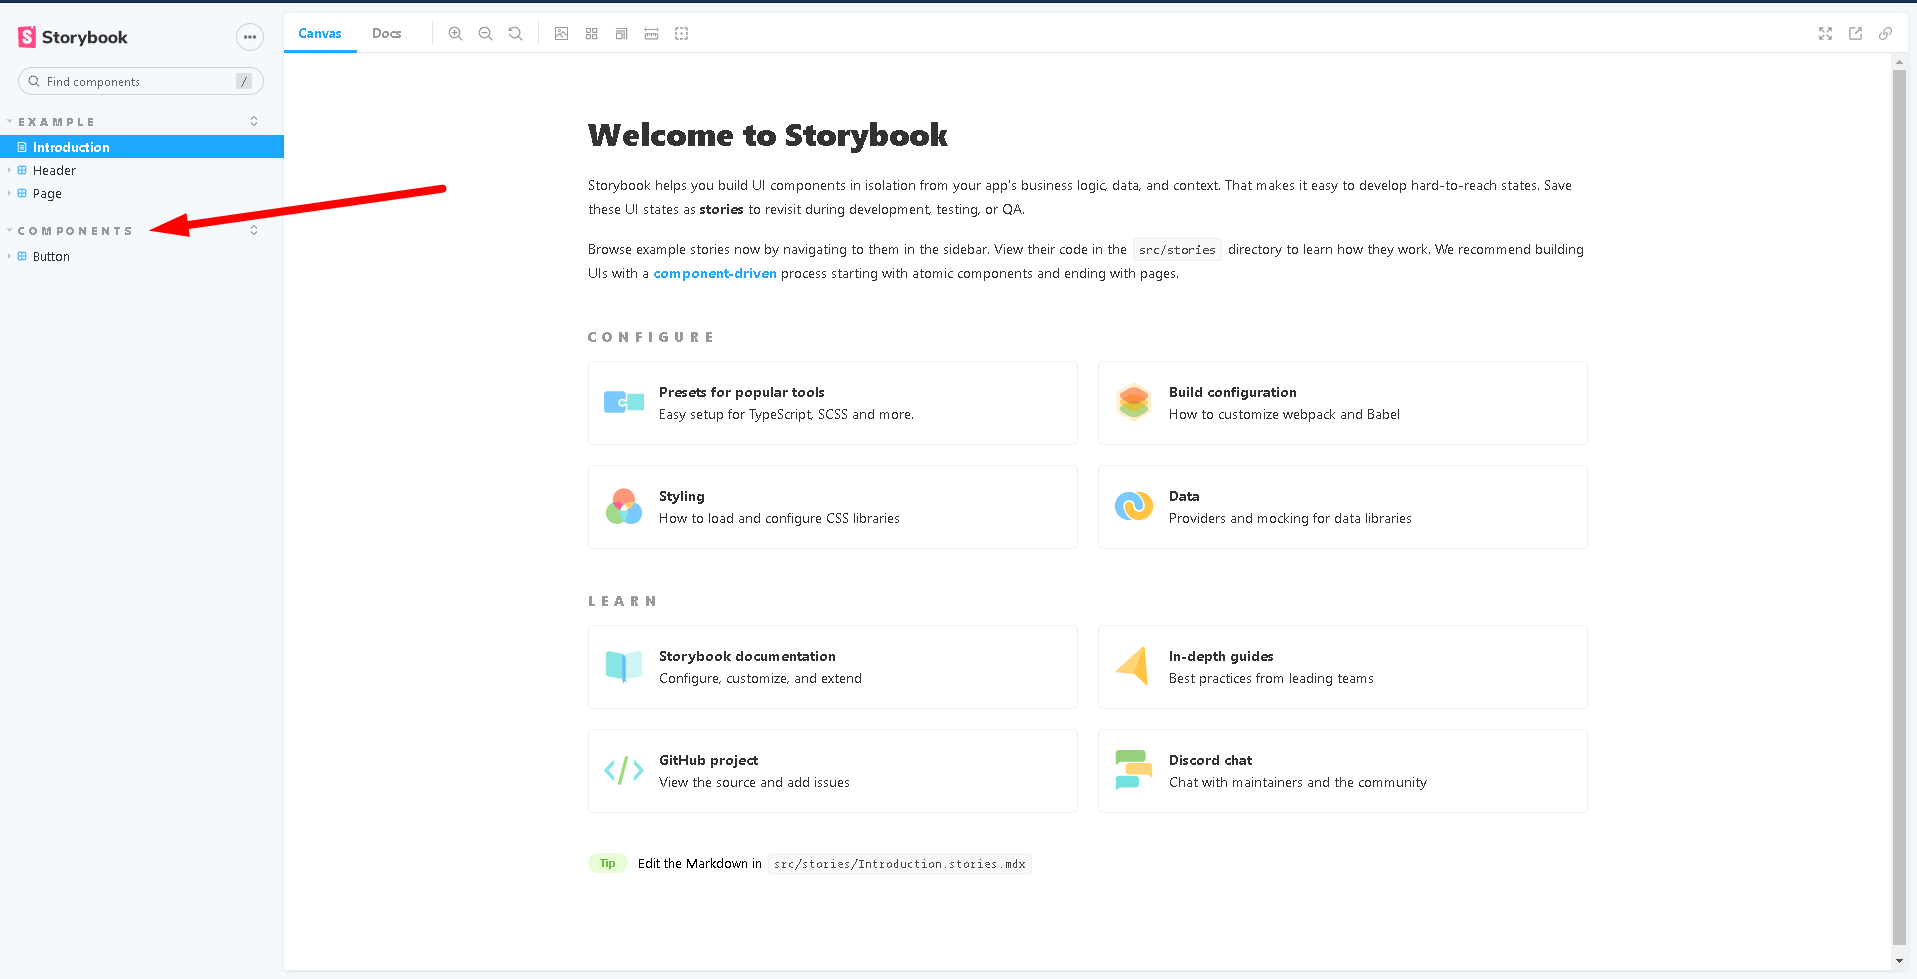
As we can see we have the three components we mentioned before, with their stories in the left sidebar and in the middle a page where we can see links that can help us to search for documentation about Storybook.
The first thing to note is that in the sidebar the three components are located under the tree node with the name EXAMPLE, this is very important because it will allow you to organize your components by groups.
For example, if we go to the code of the first story Button.stories.jsx, for which go to your favorite editor:
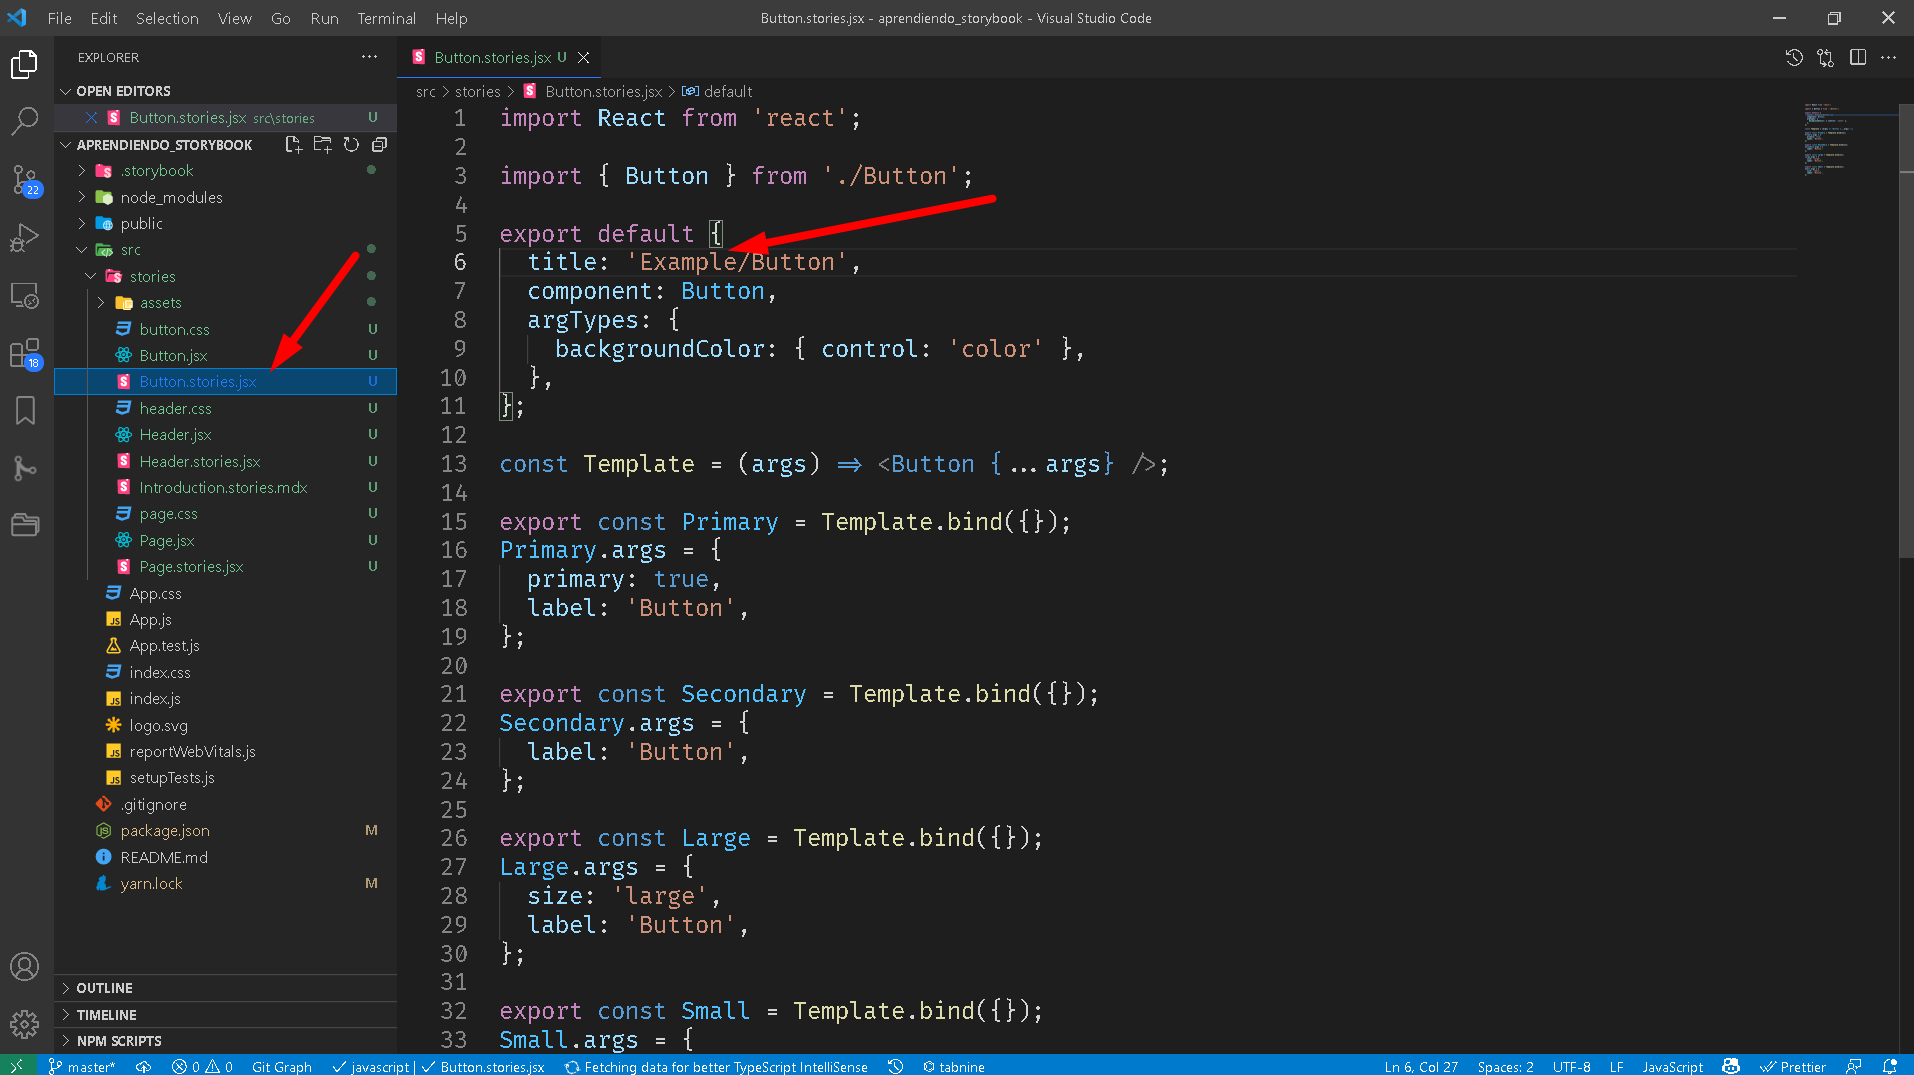
And then we change the name EXAMPLE to Components, the result will be in the Storybook page a new location of the story related to the Button component under the node: Components as highlighted in the following image:
Now, what are stories and how are they represented by each component?
A story is a collection of components that we can preview in Storybook. The preview includes the possible status and accessories it can take, and how it looks in dependencies of the properties we add to it, for this we usually create a template from the component and start modifying its properties. In the example code for the Button component, we can see how to easily create the Template and its stories within its history.
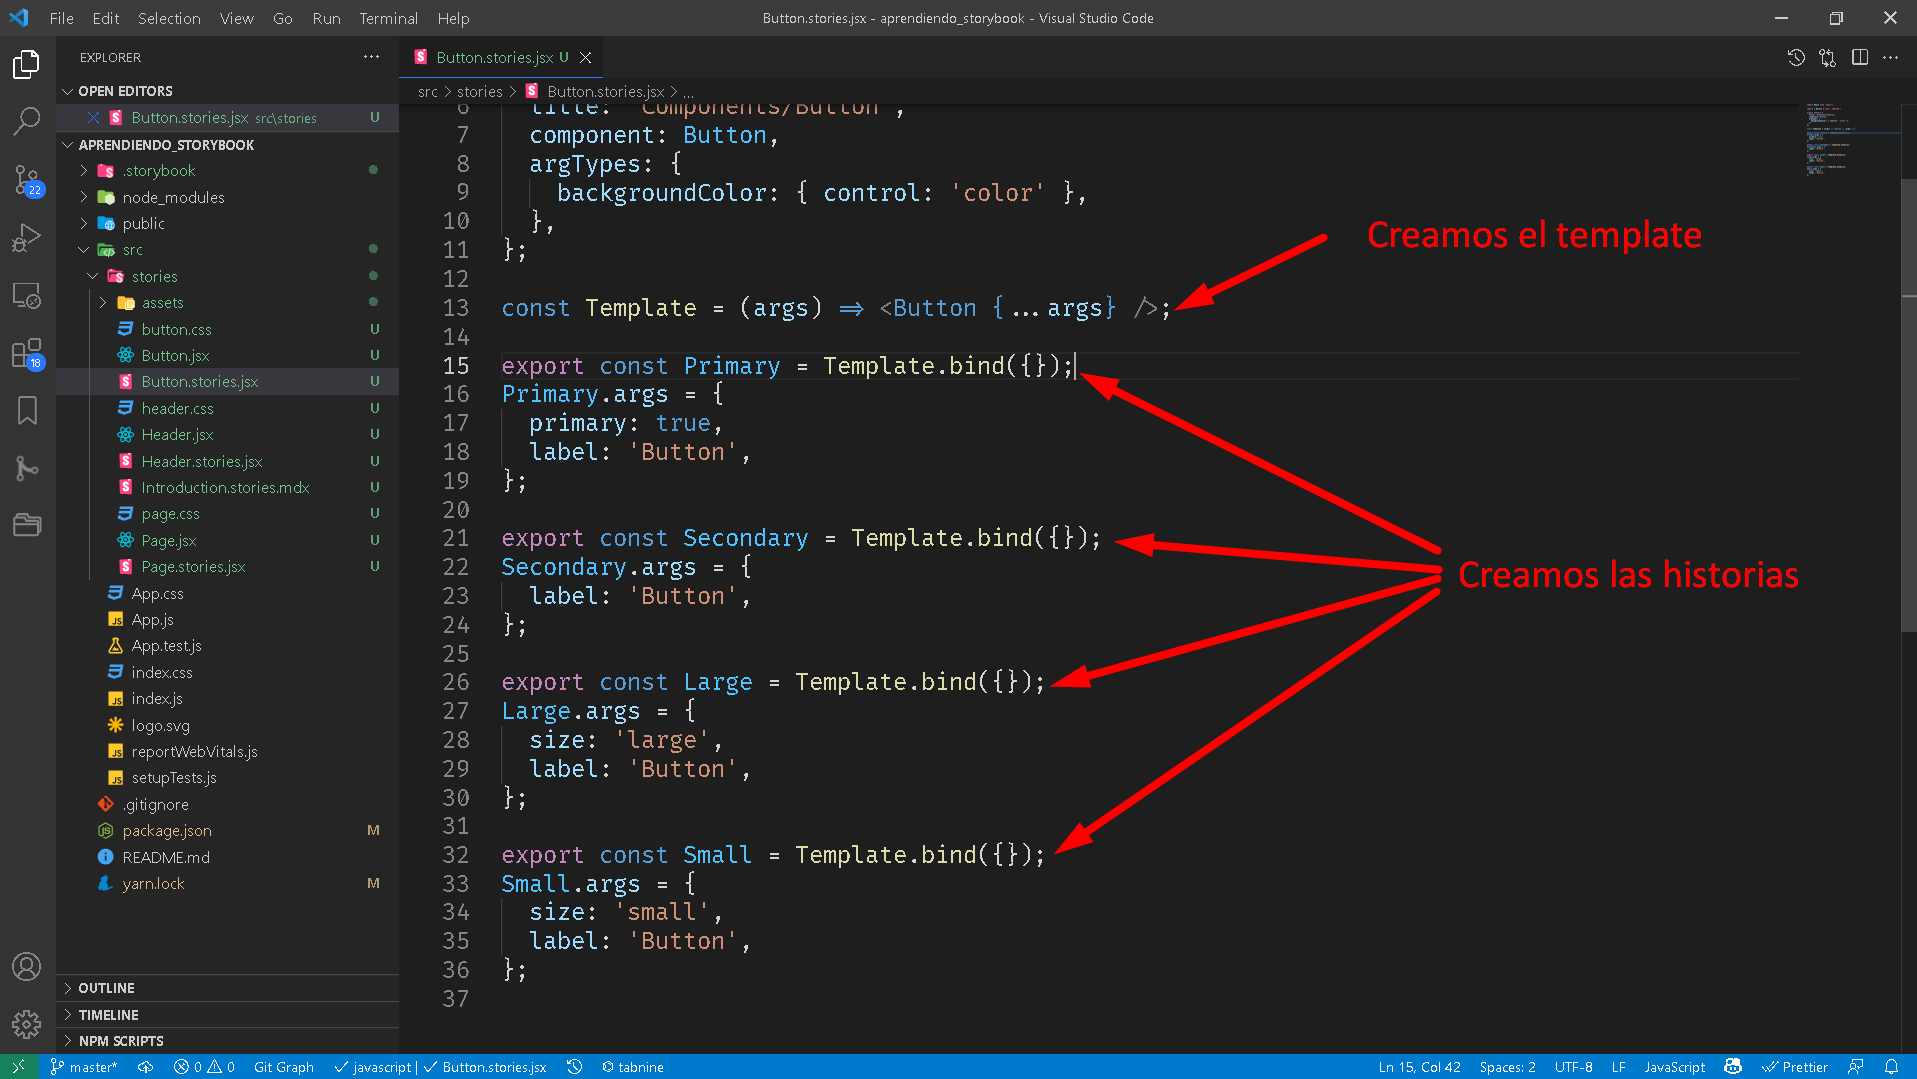
It is important to see how several instances of the component are created, in this case: Primary, Secondary, Large and Small, and with the use of the special attribute of Storybook args the properties are passed to it, these different properties are the ones that do not create the stories and the final result in the Storybook page is:
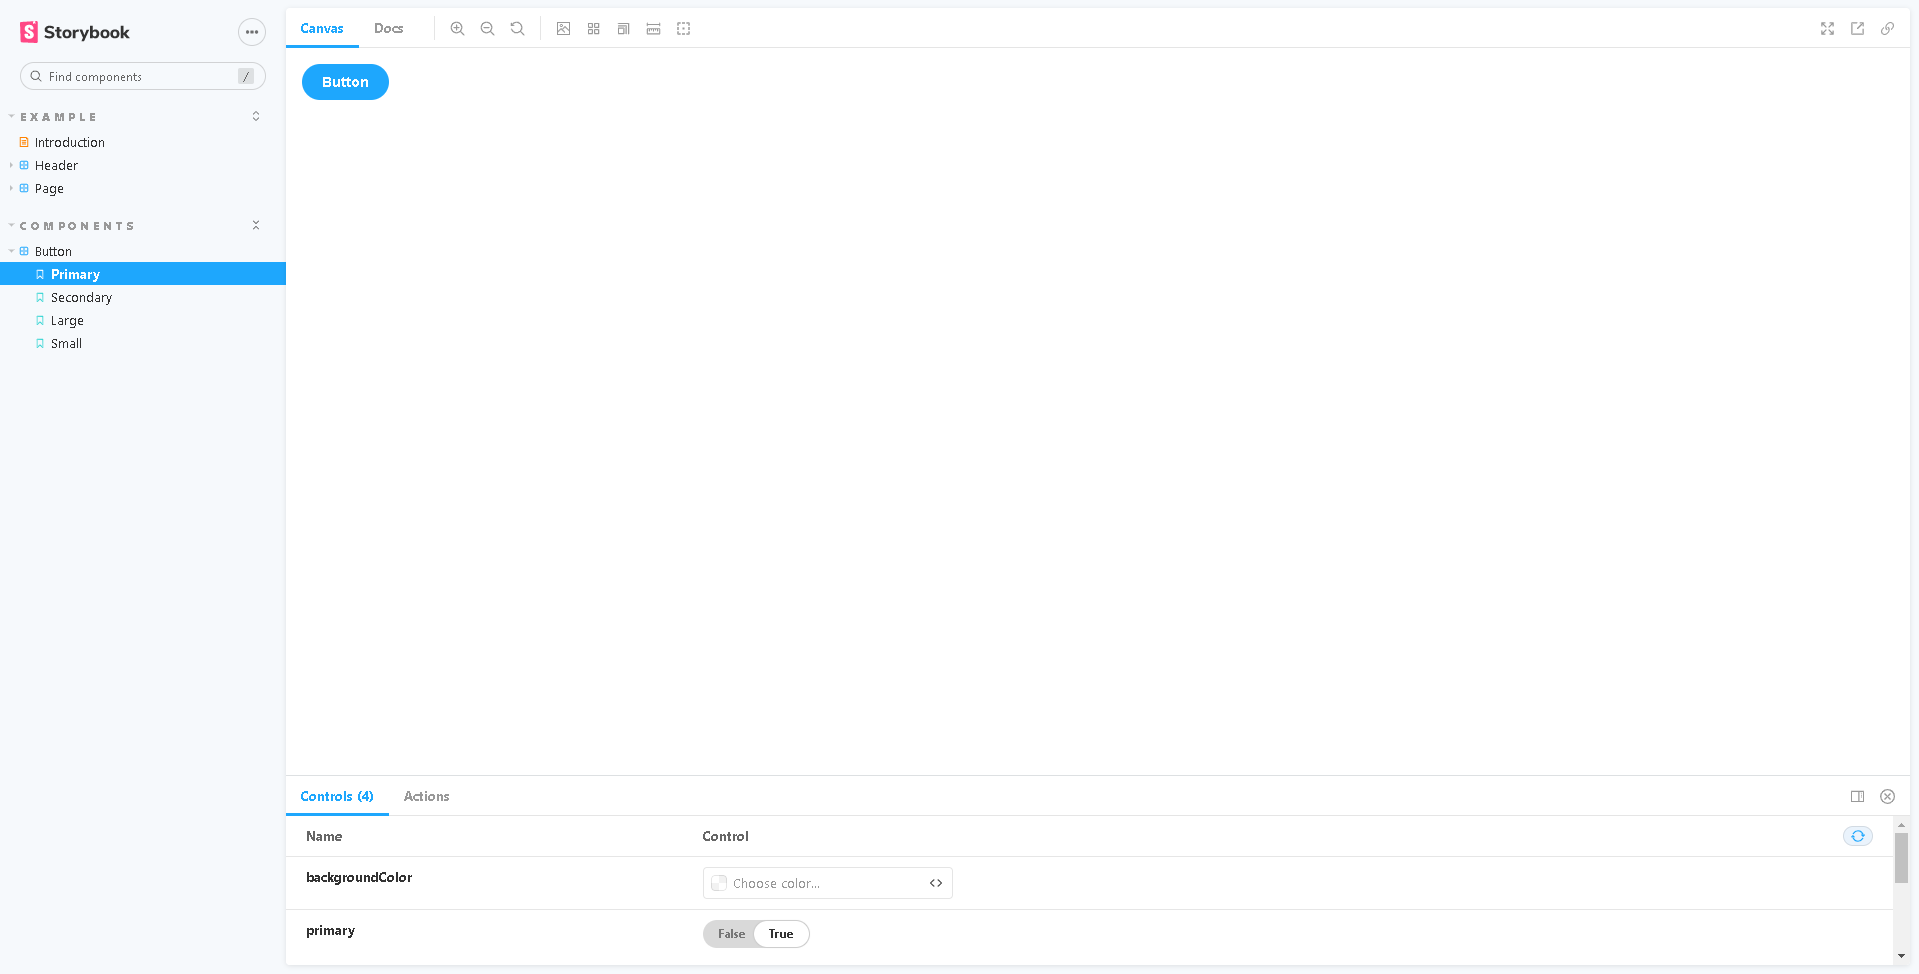
Where we can see that each instance that we create has a representation, if you navigate by clicking on each of them you will be able to see how it behaves, according to the properties that we have changed in the code.
We can already see the advantages of Storybook, a place where we will have the stories of our components and how they behave according to the properties, in addition, each story with a name that will help new members to quickly understand how to use a component.
Test your components
Another important feature of Storybook is that it is smart enough to deduce which are the possible values that can have the properties of a component according to the propTypes that you define in the component, and with this, inside the Tab Controls, it will create simple controls to be able to test how our component behaves when we make changes to it.
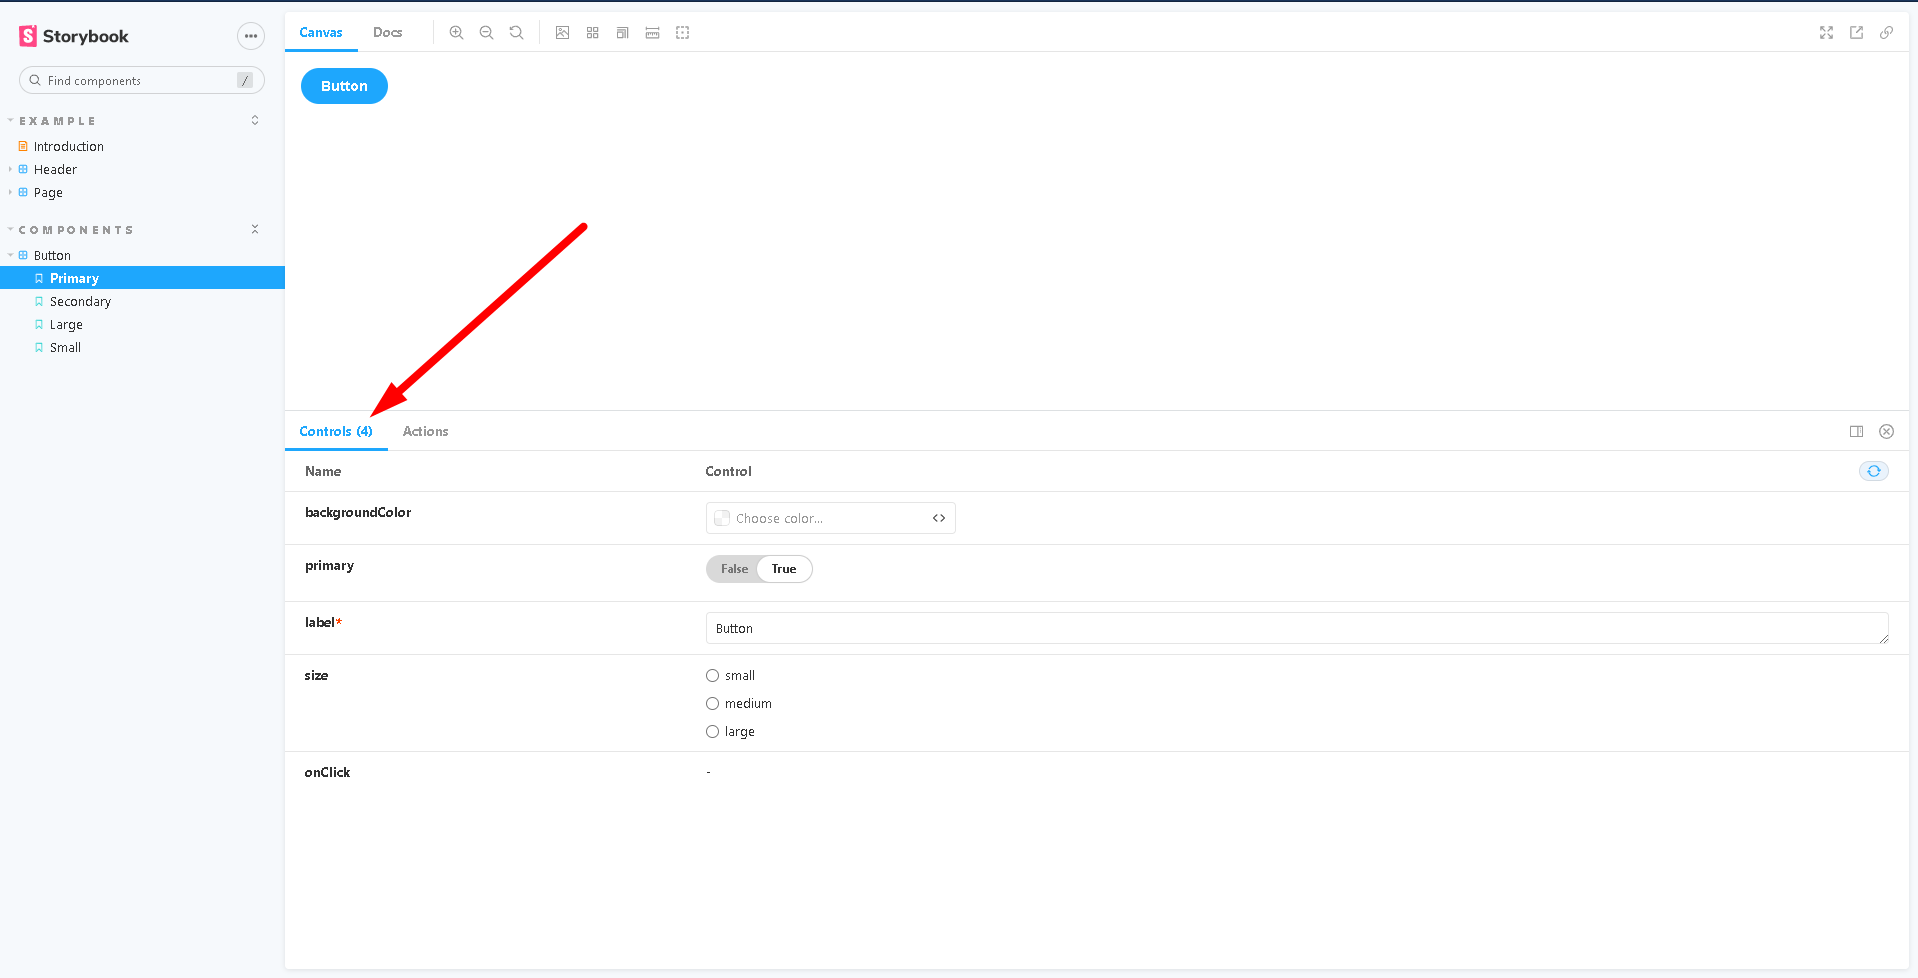
In this simple way we can test our components.
Also, in the sidebar above we have other elements to test our stories.
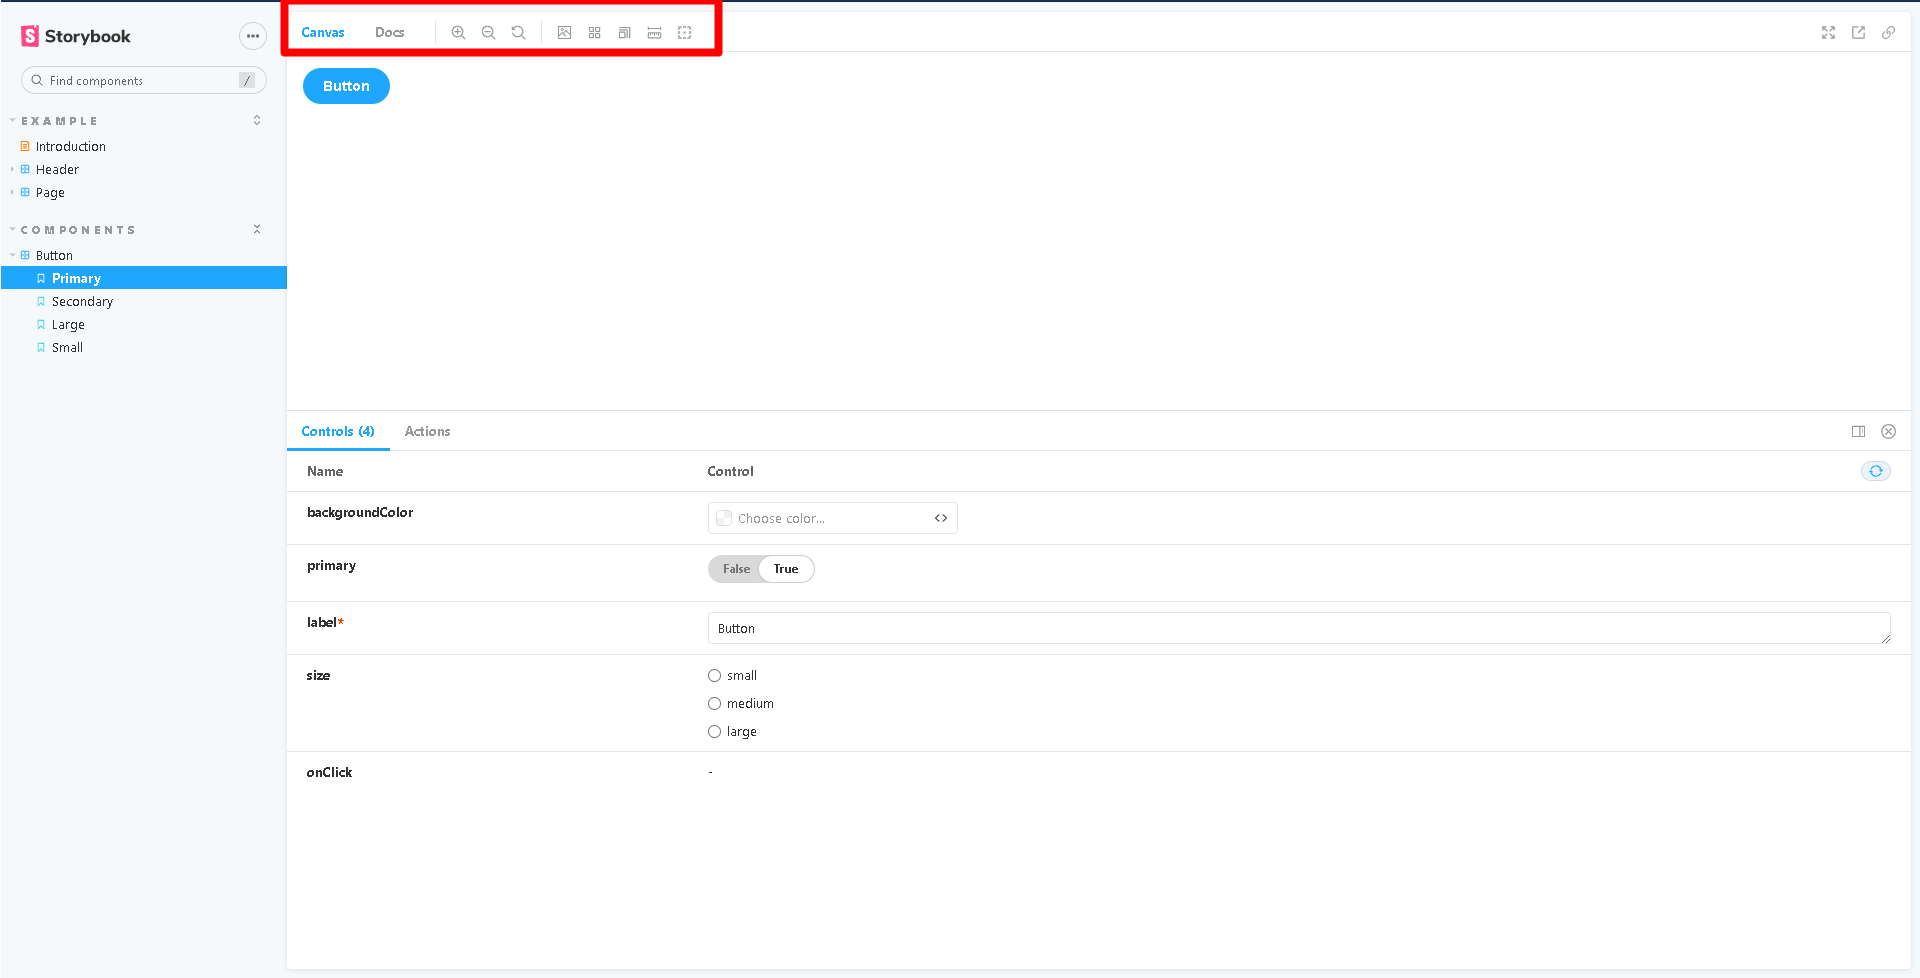
Play with them and see how they can help you make your components look their best.
Conclusions
In this first part we have seen how to install Storybook in a ReactJS project, how to get the server up, how to use the sidebar to organize our component stories and how Storybook helps us to test it by creating controllers from its properties.
In the next article we will be talking about how to add extensions to simulate the server response (mocking data with msw).
Bibliography